Our miniscule remodel budget did not have room for purchased cabinets, so we had to get creative. We took 2 routes:
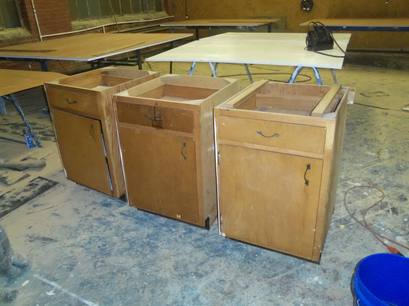
- We re-purposed used cabinets (16 purchased on Craigslist for $250)
- We built new ones. But even here we economized, working from a stack of 24"x48" plywood sheets purchased for $3 each on CL, repurposing the dining room paneling into drawer boxes, and supplementing only when required with some $50/sheet purchased plywood.
Rehabbing Cabinets
|
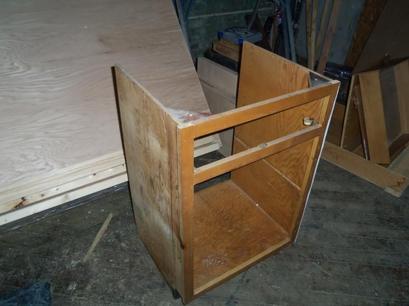
The first rehab project was a kitchen base cabinet turned into a bathroom vanity. This is what we started with. Step one: remove doors, drawer, hardware, and inside shelf. They were held in place with screws (easy) or staples (much more of a challenge). Step two: Cut it to size. The 24" width was perfect, but it was also 24" deep, and we needed it just 19". Two quick cuts on a table saw sliced down the sides, and a circular saw finished off the bottom shelf.
Step three: Follow Squidoo's Guide to painting cabinets. This is a thorough process of cleaning and prepping before finally priming and painting. We had to putty holes and router cuts to even up the surface for painting as well. We used Sherwin Williams ProClassic paint, which is designed for cabinets, and were very happy with the smooth, durable finish. |
|
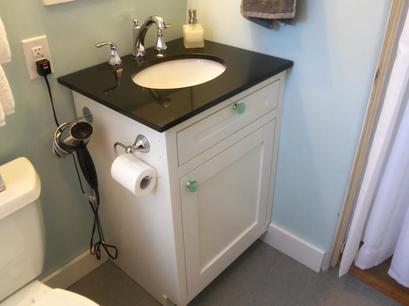
Two unfinished doors purchased from barkerdoor.com, and mounted inset-style gave the original cabinet a completely new look. The top panel is a tilt-out. |
Building Cabinets
|
A cabinet is a 5-sided box, open in the front. They can be frameless, but we opted for face frames to finish out the fronts. For our base cabinets, we used 1/2" plywood for the sides, top and bottom, and 1/4" for the back.
We had a stack of $3 blanks that we used for the boxes. A bunch of them even had routered rabbets to slide the tops and bottoms into. So it was a matter of cutting out the toe kicks on the sides, cutting the top and bottom to the width we wanted, then gluing and brad nailing them into the router grooves on the sides. Then, after carefully squaring the cabinet (lay it on its front, measure the diagonals and shift the alignment until the diagonals are exactly the same), we glued and nailed the backs onto the cabinets. Once everything dried, we made face frames out of 1x2" select pine (purchased), pocket hole screwed together. When measuring/designing, keep in mind the following:
|
Building Drawers
|
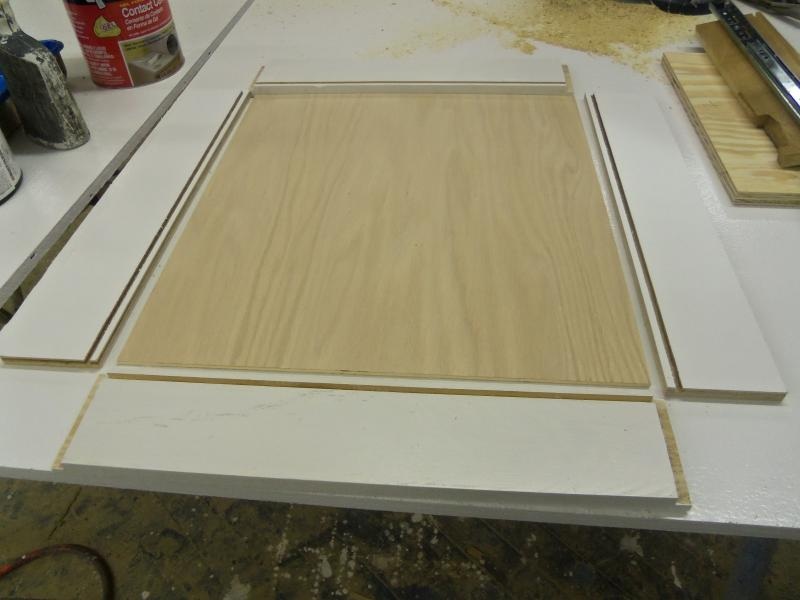
There are several methods for building drawers. After googling and watching several youtube videos, I settled on a simple but durable construction that I could accomplish with a table saw and router table.
Here are the parts laid out. Front & back: 3/4" solid pine--salvaged from our dining room paneling tear-out, with edge rabbet routered out, and 1/4" x 1/4" rabbet to hold the bottom. Sides: 1/2" plywood, with 1/4" x 1/4" rabbet to hold the bottom Bottom: 1/4" plywood Cost note: I could have bought pre-cut drawer box blanks from barkerdoor.com for $26-$35 each. These cost me less than $4 each for materials. Assembly:
|
|
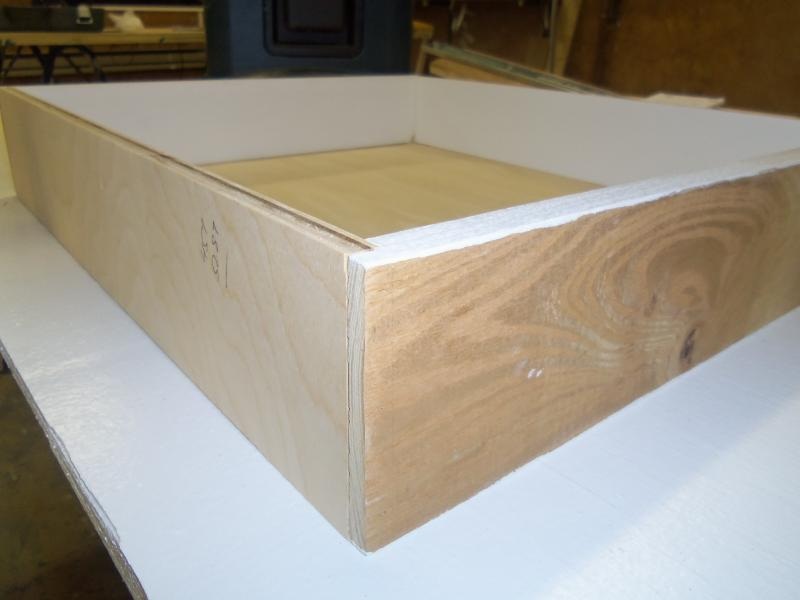
A note on the finishes: Some of the cabinet blanks I cut up had white laminate on one side, so I made the drawer sides white, painting the fronts and backs to match. Other blanks had natural color laminate on them, so I used Minwax Polyshades to finish those, as well as all the drawer bottoms. I sanded, but did not finish the outsides of the drawer boxes.
Installing Drawers and Glides
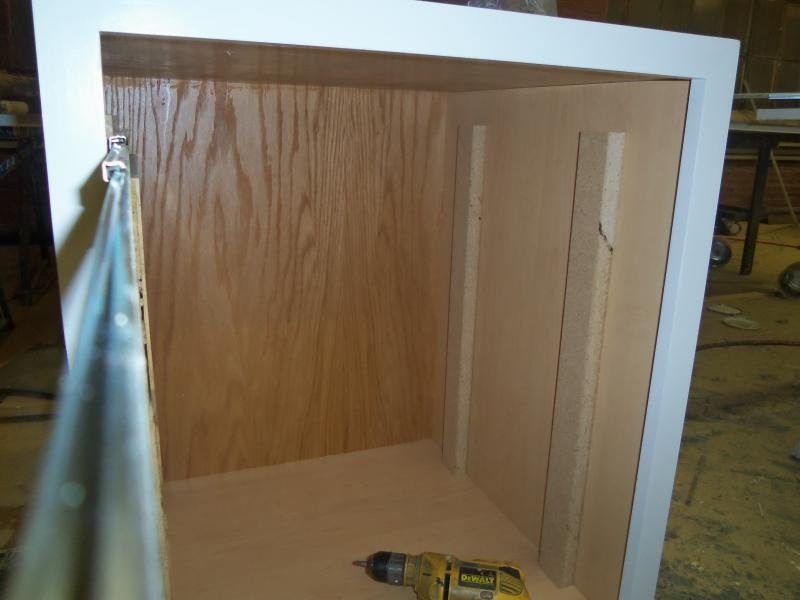
Drawer glides are designed to be mounted flush with the cabinet opening. Since these face frames protrude 1" inside the box, I had to attach 1" thick mounting strips for the drawer glides so they could clear the face frames.
|
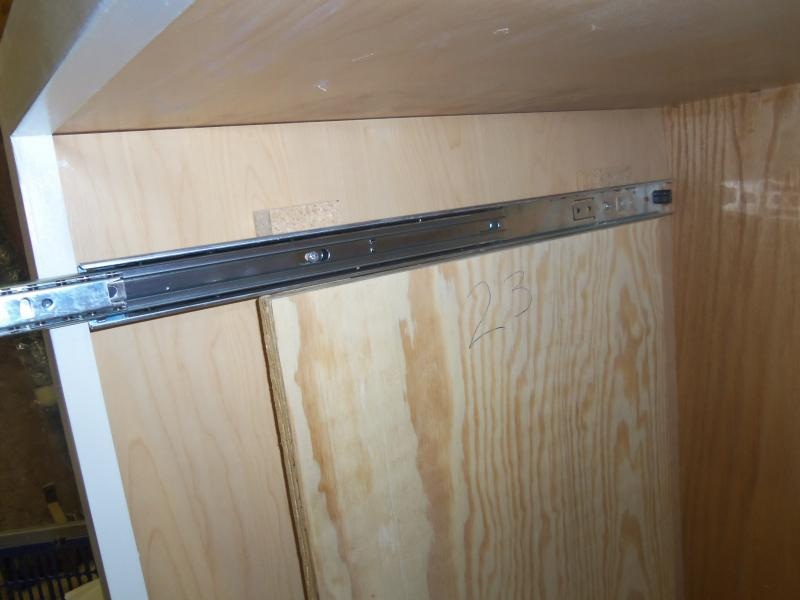
It's critical to mount the drawer glides perfectly level, and exactly the same height on both sides. The easiest way to do this was to cut plywood to the needed height, set the drawer glide on it, and screw it in to the mounting strips. A repeat on the other side gave me perfectly even glides. I worked my way down with shorter pieces of plywood for each drawer.
|
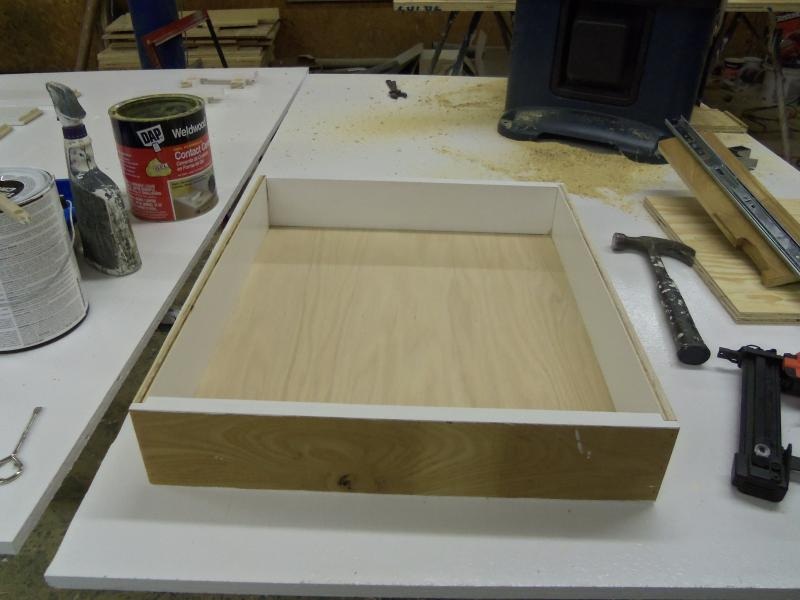
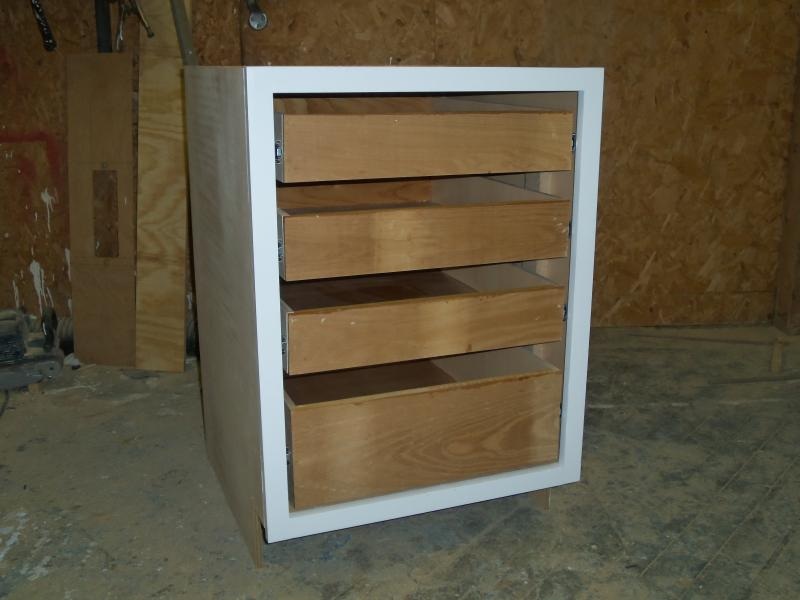
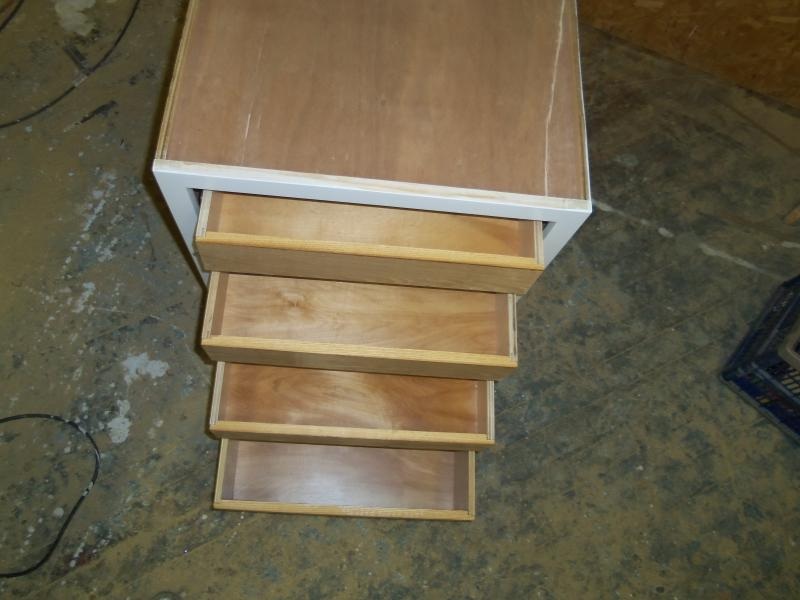
And here are a couple views of the completed, nicely stacked, nicely finished, drawers.
Building Upper Cabinets
Similar to base cabinets, uppers are also a 5-sided box with a face frame. There are a few differences:
- Depth: Wall cabinets are usually 12" deep, as compared with base cabinets, which are usually 24" deep.
- Toe kick: Wall cabinets have no toe kick, so the bottom is just an inch or so up.
- Backs: Wall cabinets are completely suspended by screws through their backs, so the backs have to be sturdy enough to support the load. We used 1/2" plywood, vs. 1/4" on the base cabinets. Base cabinets are screwed through the back to hold them to the wall, but the bottoms also rest on the floor.
|
It worked best to design the whole set of wall cabinets, because then the parts can be mass-produced.
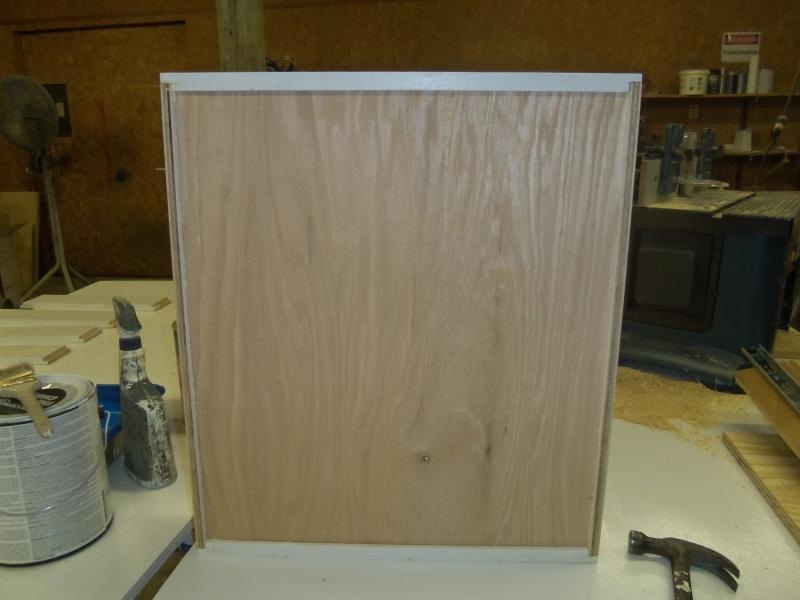
Sides: made of 1/2" plywood blanks, with routered rabbets 1" from top and bottom and vertically along the back. Also pre-drilled holes for shelf pins using a peg board as a template. Tops & bottoms: made of 1/2" plywood blanks Backs: made of 1/2" plywood blanks Construction: Glue the rabbets in the side pieces, put together with the tops and bottoms and nail with 1" nails to hold in place. After checking cross-square, glue and nail the back into the inset portion. Let everything dry perfectly square before moving Face Frames
I laid out all the cabinets in the shop to make sure the face frames would all align perfectly. I opted for the face frames to be even with the outside of the cabinets for 2 reasons: to maximize the actual interior cabinet space, and to match the original cabinets that we repainted. |
