Kitchen
The Before...
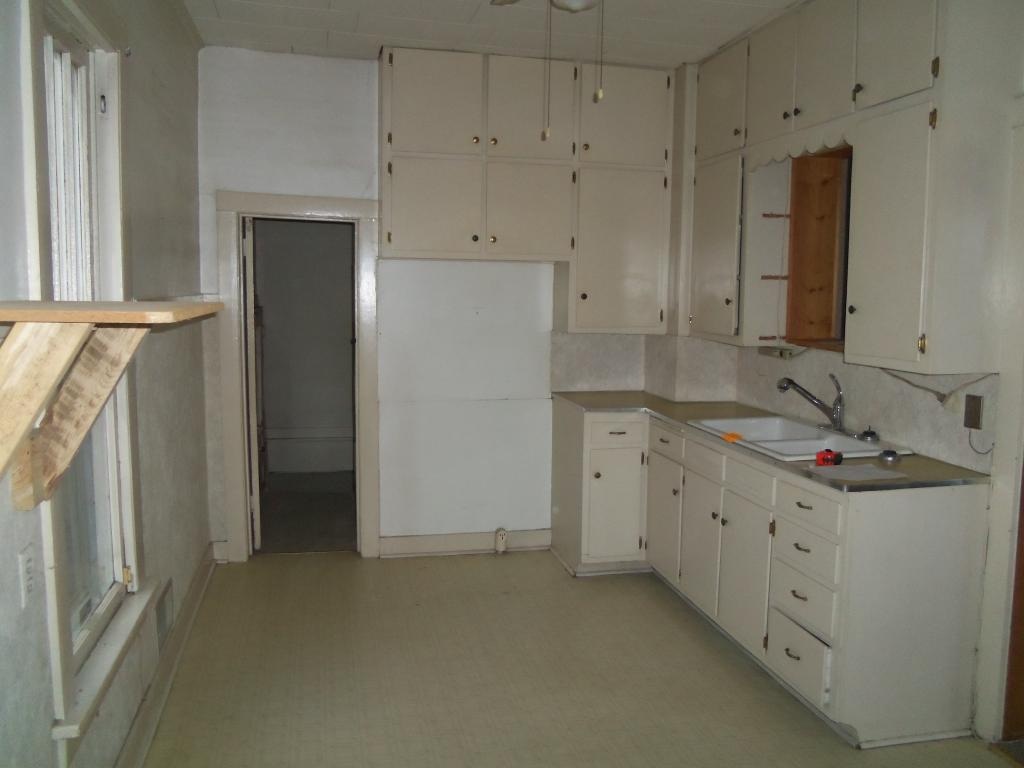
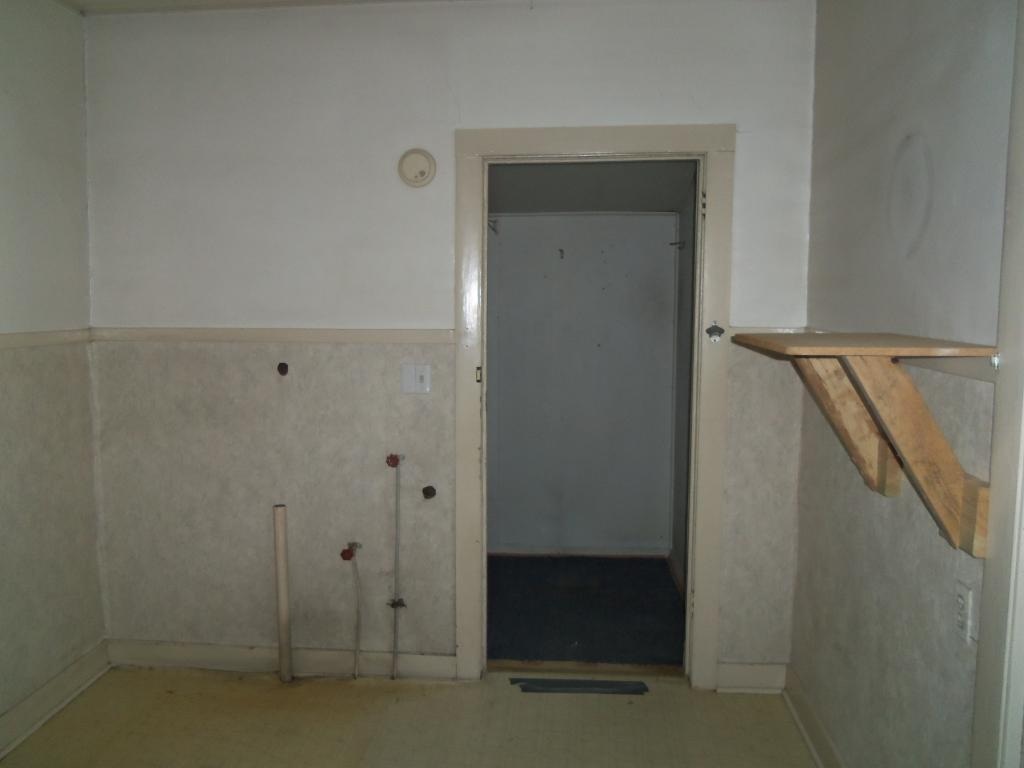
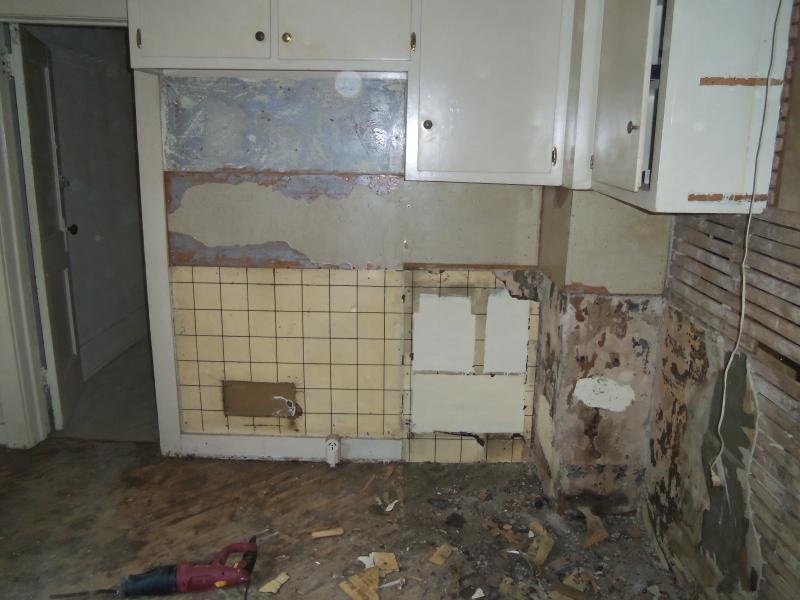
Looking left: Original kitchen cabinets, and backsplash power provided by a power strip plugged into an extension cord that wraps around the corner into an outlet in the dining room. Through the doorway is a hall that leads past a pantry and down to the basement stairs.
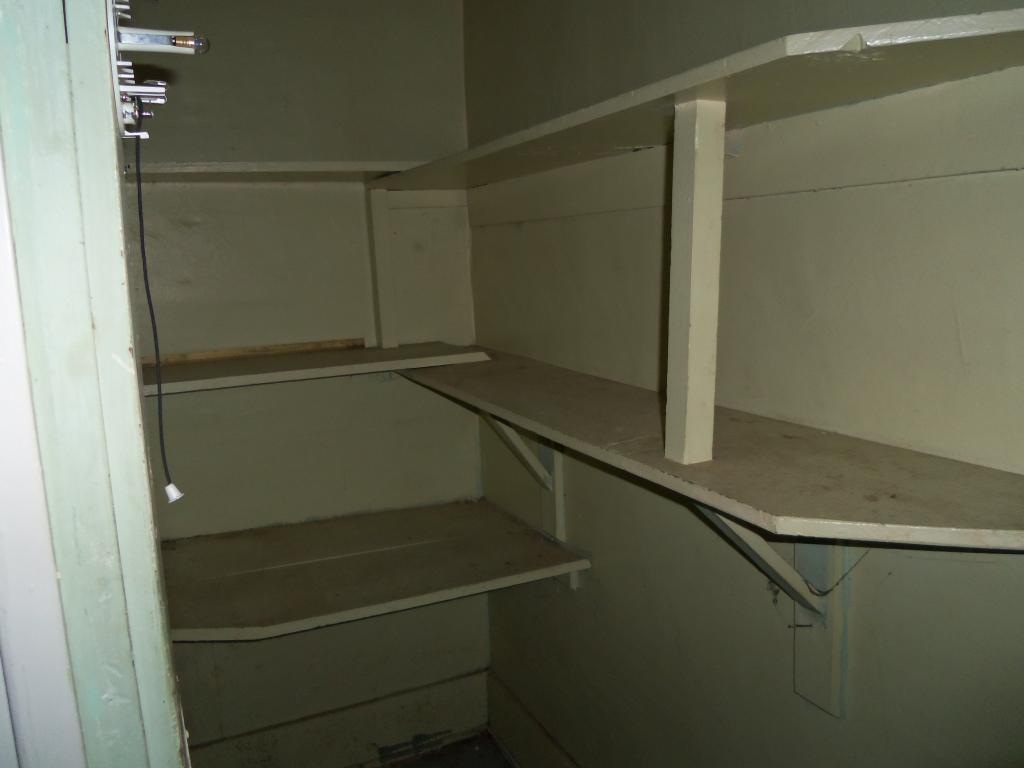
The walk-in pantry is 3' wide and 6' long, and thus a poor use of space.
|
Looking right: They put the washing machine against the wall and the microwave on the shelf. Not sure where they put the fridge. A laundry room addition is through the doorway.
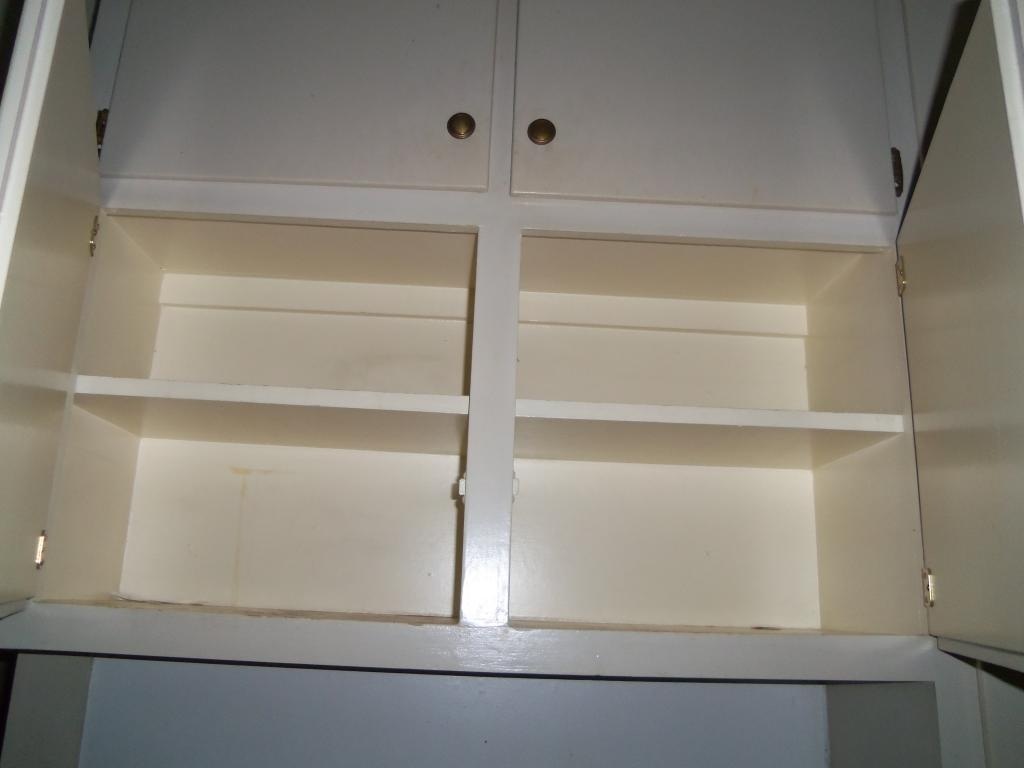
The cabinets are actually pretty solidly constructed, albeit a tad grungy, so they're reusable.
|
The Plan...
Replace the window with something shorter in vinyl (this is the only window that hasn't been updated)
Move the 2 doorways to the center of their respective walls
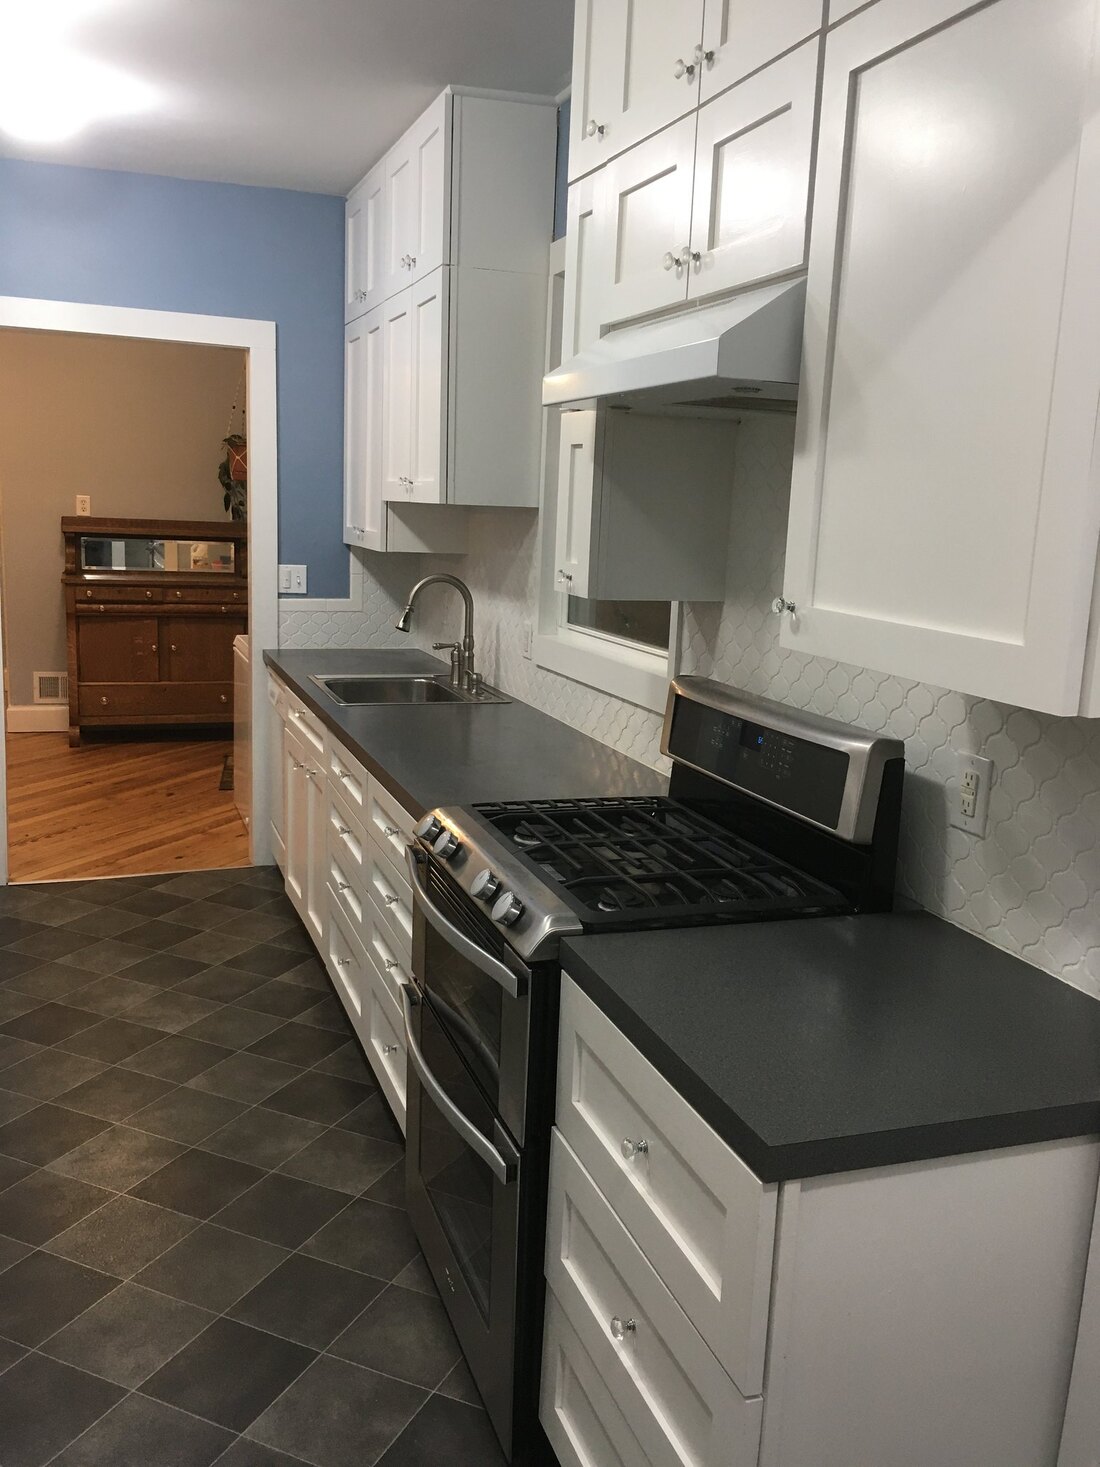
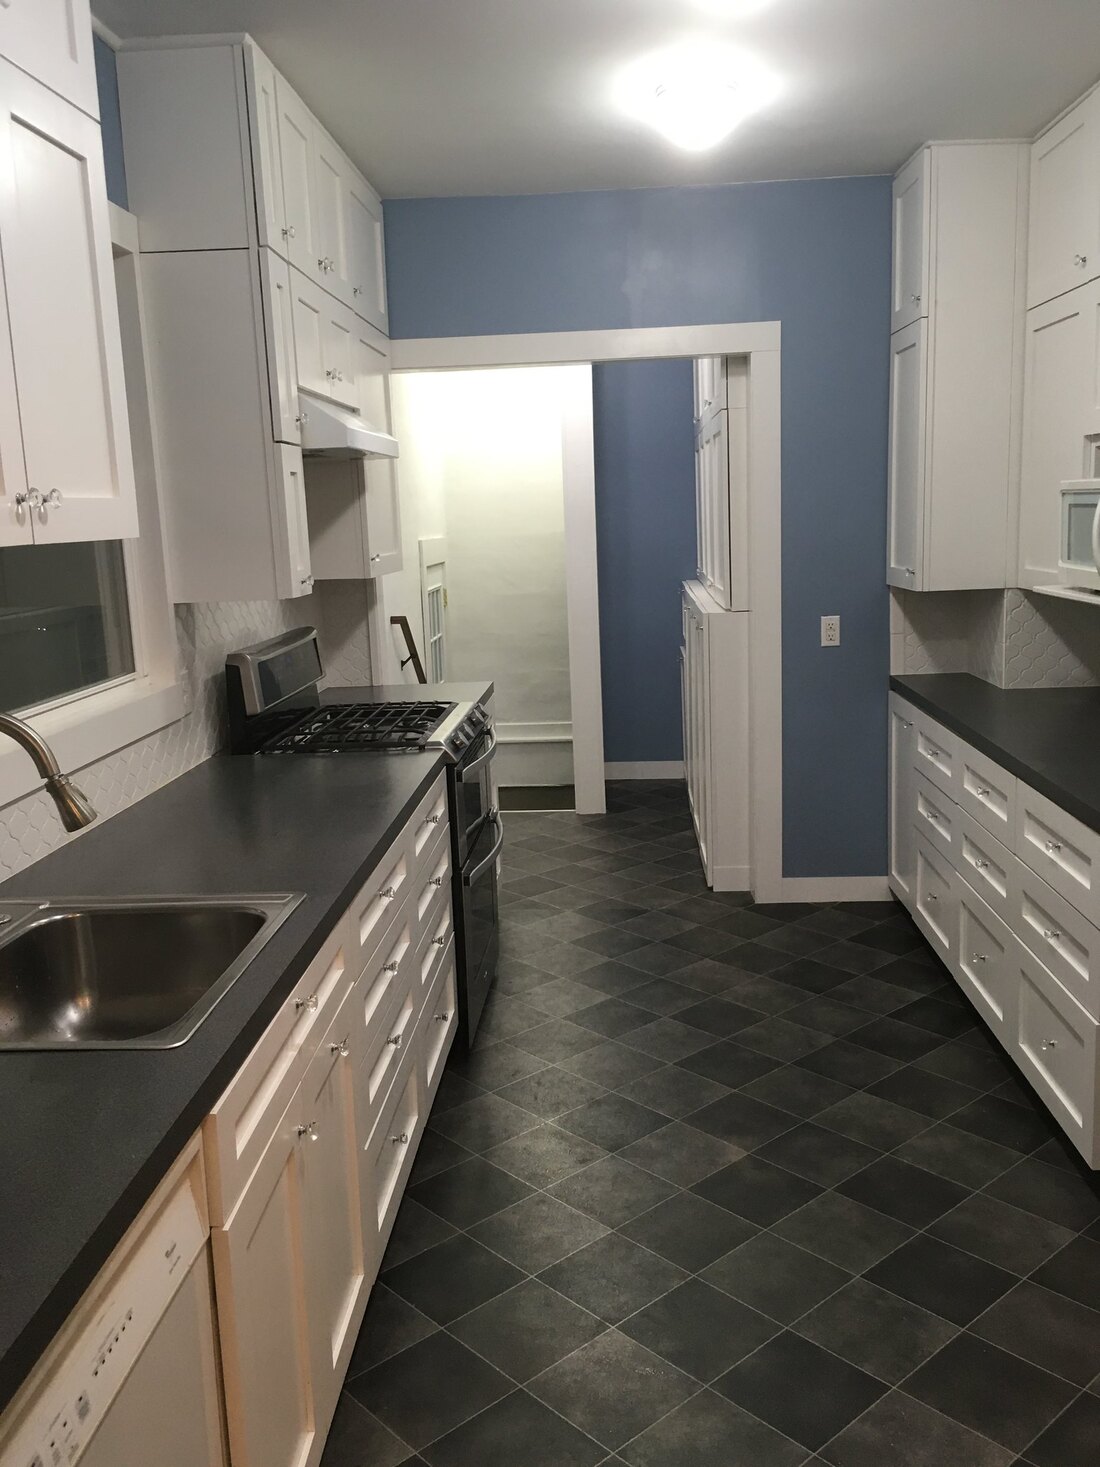
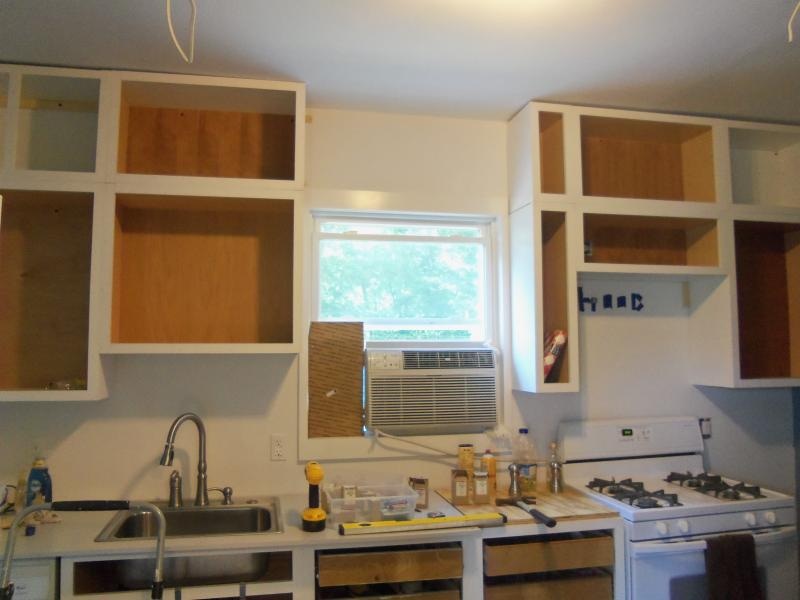
Create a new row of cabinets along the outside wall, making a galley kitchen, with the sink under the window
Keep the existing cabinets, but remove the sink cabinet and install a range. Replace doors and drawer fronts
Relocate the section of cabinets formerly over the range to the new galley wall.
Remove the pantry (will become a hallway) and build some pantry storage along the galley wall
Tentative plan is to DIY all the cabinet building and buy door and drawer fronts.
Move the 2 doorways to the center of their respective walls
Create a new row of cabinets along the outside wall, making a galley kitchen, with the sink under the window
Keep the existing cabinets, but remove the sink cabinet and install a range. Replace doors and drawer fronts
Relocate the section of cabinets formerly over the range to the new galley wall.
Remove the pantry (will become a hallway) and build some pantry storage along the galley wall
Tentative plan is to DIY all the cabinet building and buy door and drawer fronts.
The Demolition...
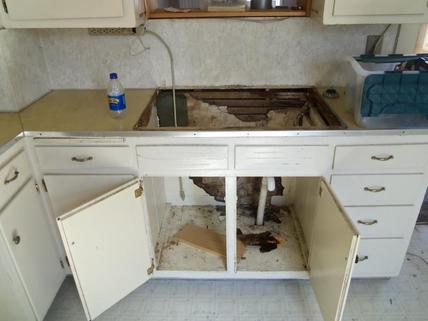
Out comes the sink plumbing. We'll install the sink in the basement, for temporary water supply for cleanup.
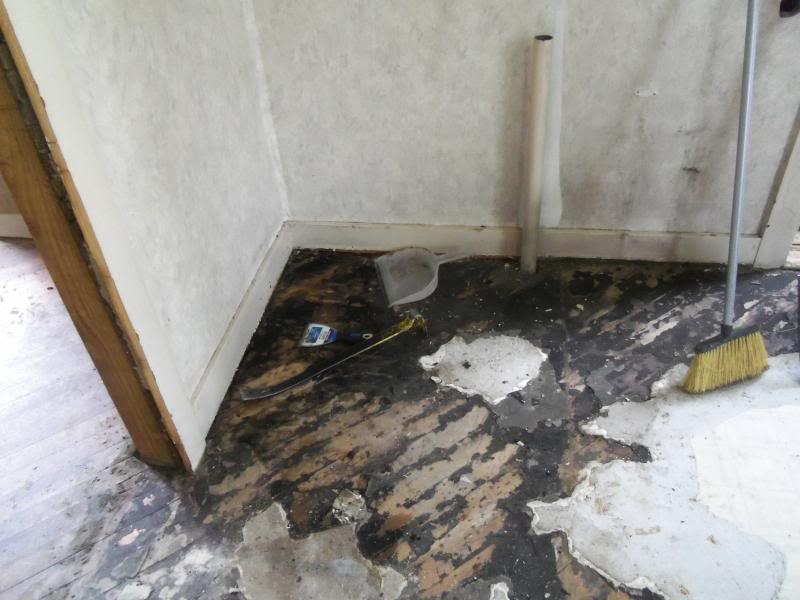
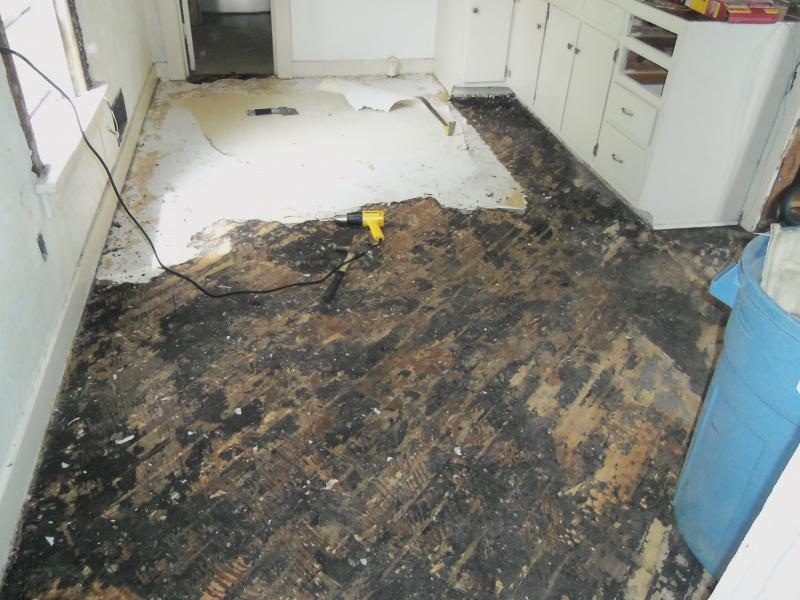
The floor was another bugaboo. Two layers of sheet vinyl and some stubborn glue. It'll take some more hacking with a better tool to clean this off.
More scraping the kitchen floor, this time with a heat gun and a paint scraper. This is after about i hour of dry scraping, 1 hour of steaming and 4 hours of heat gunning over several sessions.
Until FINALLY all the linoleum was gone. Doesn't it look so much better? :-)
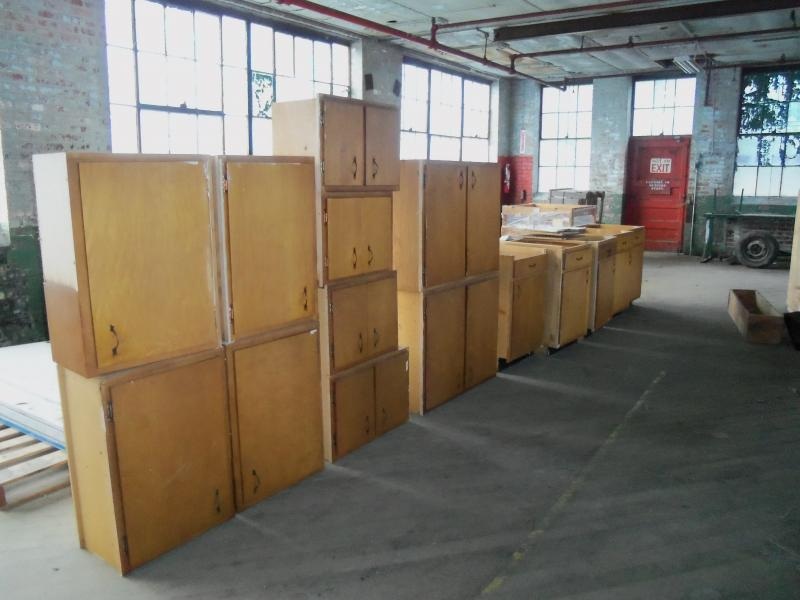
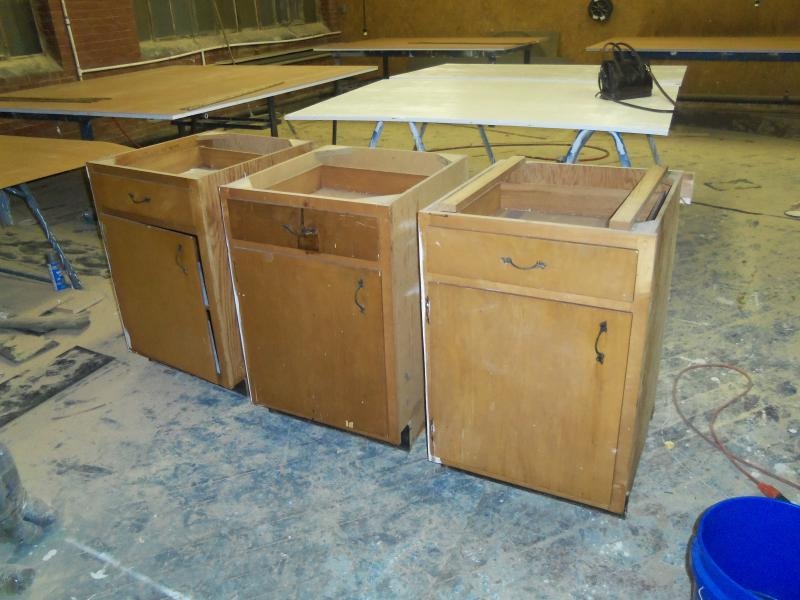
Meanwhile, we kept our eyes peeled for deals on cabinets that could be used/re-purposed for the kitchen. We chanced upon this collection, a mishmash of 60's vintage cabinets from 4 different apartments that were being refurbished. Solid plywood boxes is what we needed, and we'll have to figure out how to reconfigure them to fit into our new kitchen.
So of course, it's time for more demo. Out come the base cabinets, revealing some 1942 newspaper underneath, dating the kitchen remodel. Want ads were for a lot of wartime work, with gender and race requirements specified (!!).
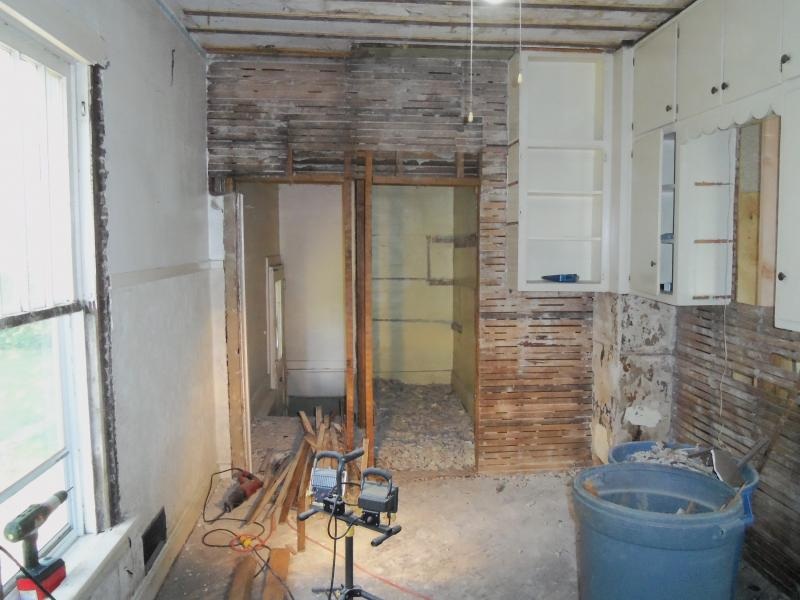
And here we are punched all the way through to the pantry. There were originally 2 door headers, for some reason. Wonder what the original kitchen layout was....
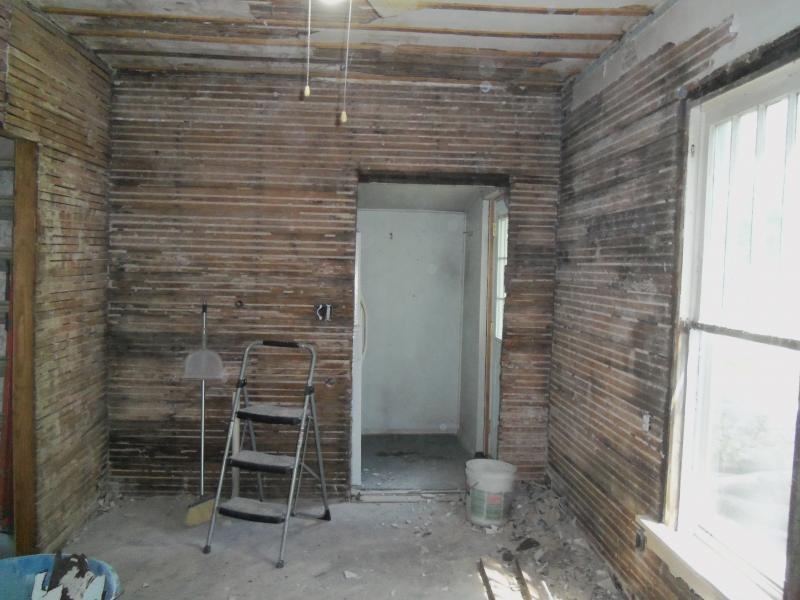
Then down came the plaster, wallpaper, luan and chair rails on the other walls. Plaster's a lot harder to get off the grooved boards on the exterior walls than off of lathe.
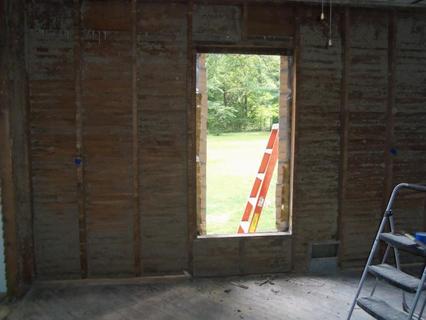
Then out with the old window...
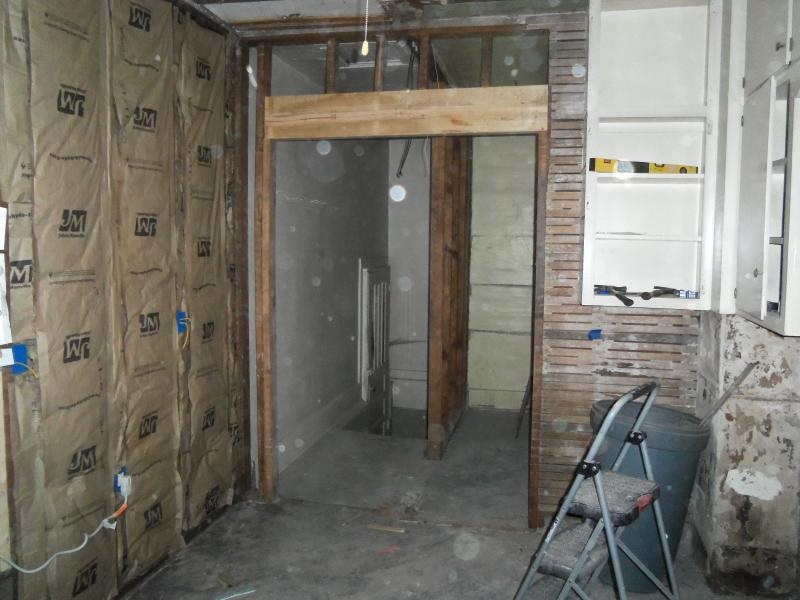
The new, properly-framed out header over the widened doorway to the future pantry and basement. Both the ceiling and floor slope slightly down to the right, but we made sure the header was perfectly level.
We hired out the drywall hanging and finishing to get the job done more quickly. We then turned our efforts to finishing the floors.
Hours of sanding with 20 grit paper made very slow progress on the kitchen floor, despite all the prep work steaming and scraping. There were water stains of some kind that wouldn't come out even with a hand sander or oxalic acid. In retrospect, looking at the underside of the subfloor from the basement could have portended this, as there is evidence of water damage, though nothing nearly like what the bathroom had. So we sighed in surrender and decided to cover it up with sheet vinyl. But before we could do that, we closed on the sale of Weedy Acres and had to move in to Little Beau. 
The 1/4" plywood underlayment, conveniently marked every 4" for ease of staple placement.
|
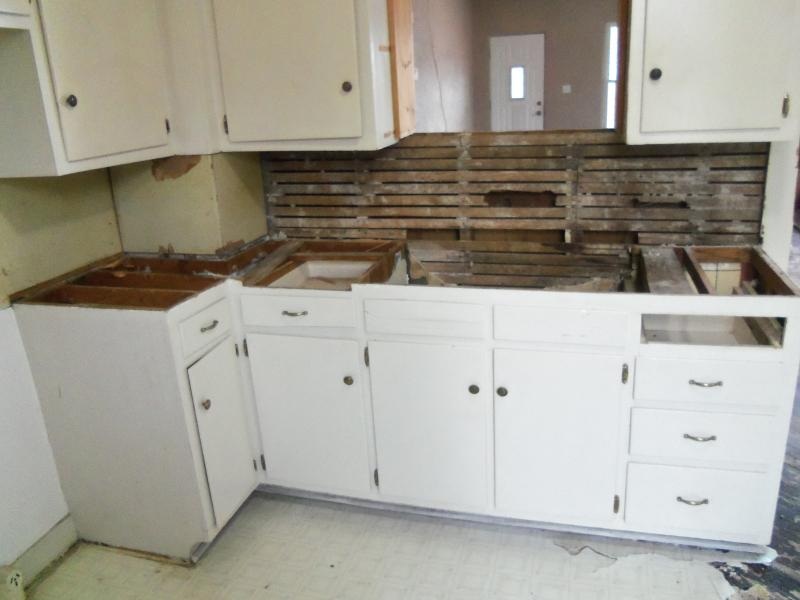
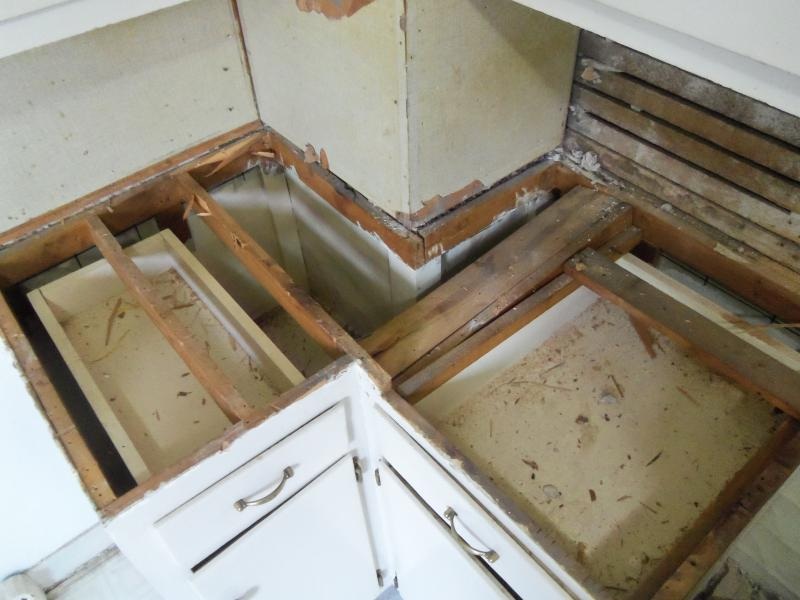
The counter was a nightmare to tear out. It had a hundred nails holding it down to the base cabinets, plus a couple layers of luan backsplash installed after the counter, boxing it in. Destruction of the wall and backsplash, along with help from a circular saw and sledgehammer, was required to wrestle the thing out.
The cabinets look like they may be made from the same wood as the DR paneling. Perhaps there was a 1950's-era remodel? This shot also shows the wasted chimney-corner space. We're mulling a reconfiguration to better utilize this.
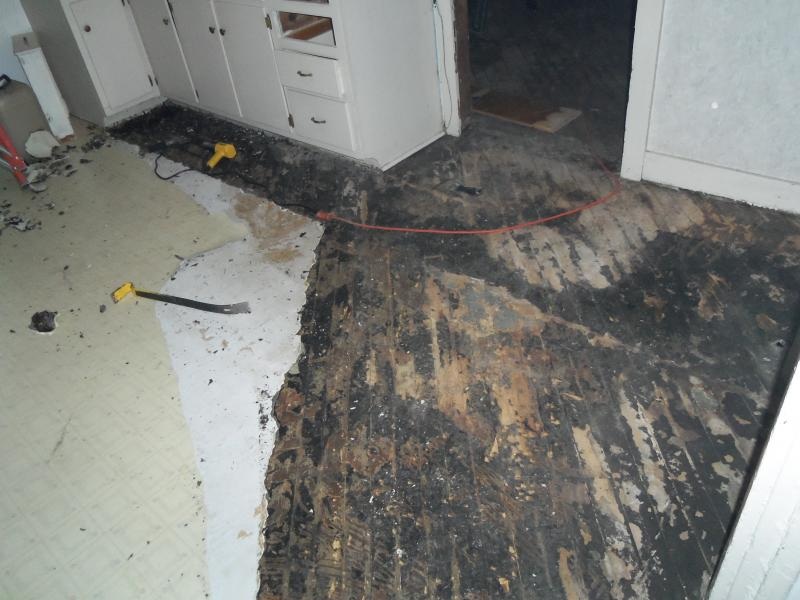
And more scraping, steaming, heat gunning.....
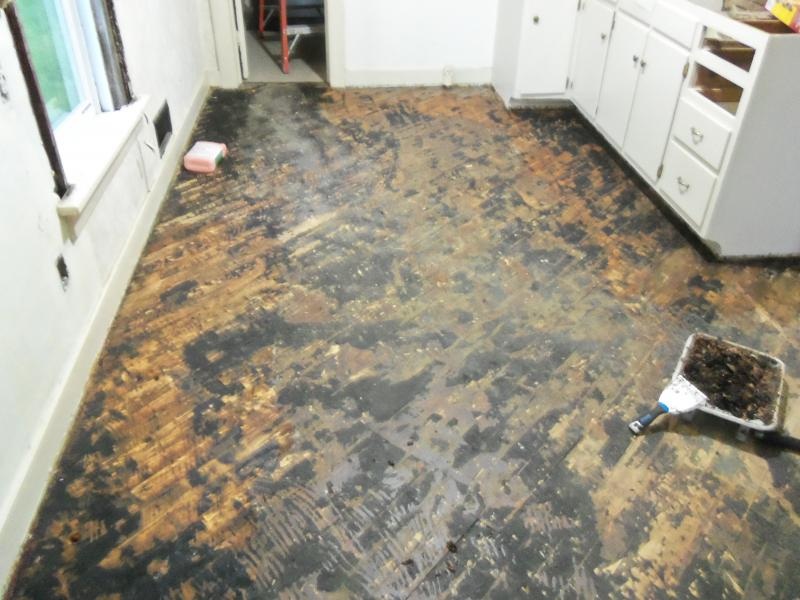
We tried some citrus solvent on the wall window and in front of the cabinets, but after leaving it for 8 hours and hacking at it with a sharp scraper, it still didn't take off all the black adhesive.
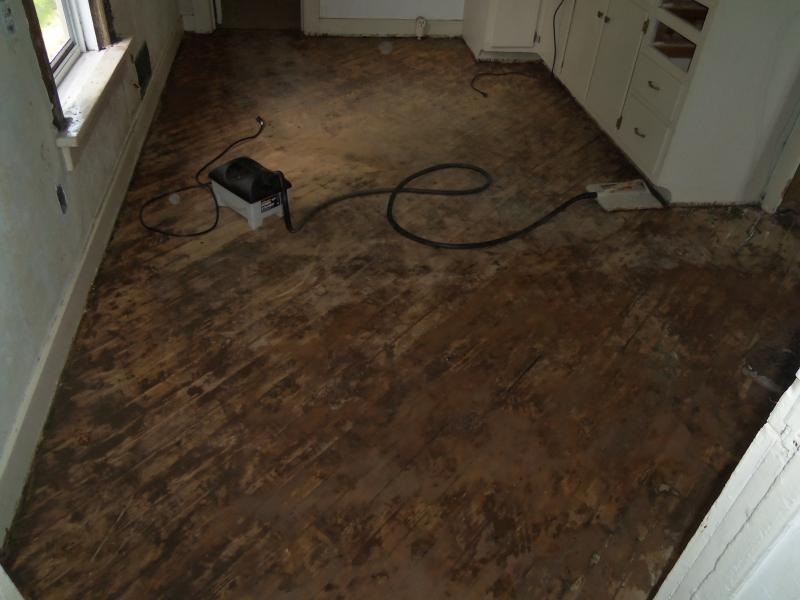
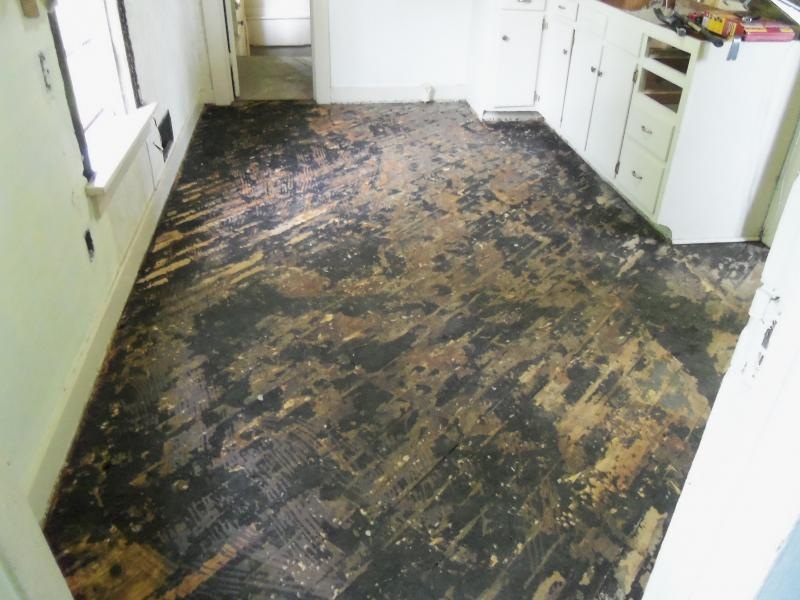
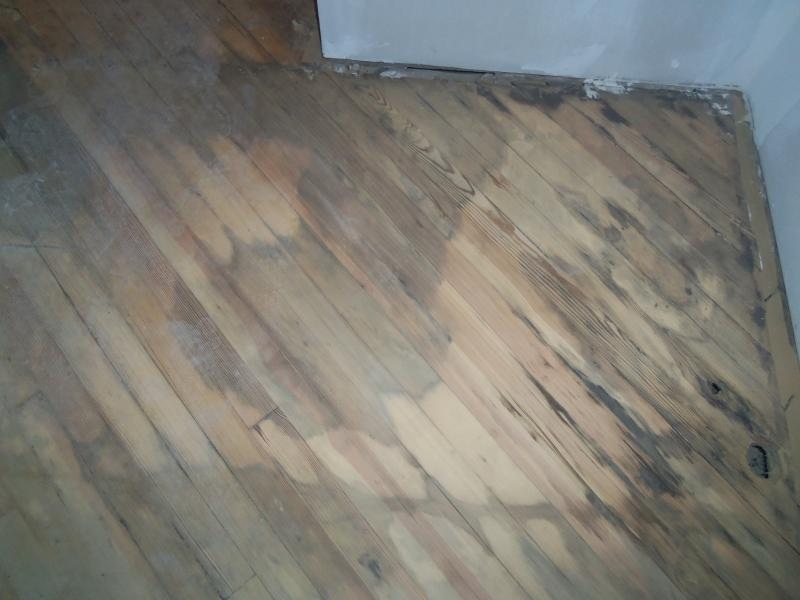
Finally, finally, finally!!! A skip to the punchline: it took hours of hands-and-knees scraping with a steamer and a few hundred gallons of elbow grease, and we have a clean wood floor!
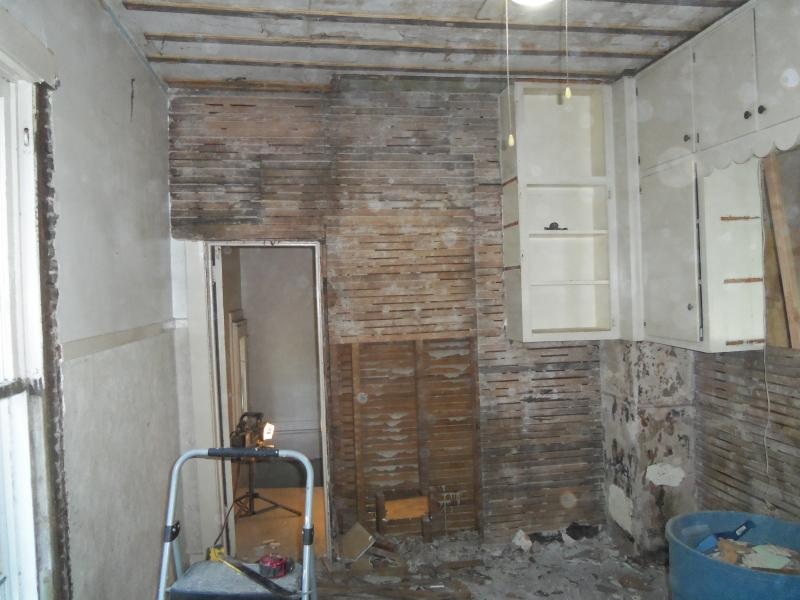
Then the surgical removal of part of the upper cabinets, along with wallpaper over luan, over 4 more layers of wallpaper over plaster. No steaming off here, just quick demo with a wonderbar. The original plan was to relocate the whole set of uppers to the window wall, but the way they were constructed in place, that wasn't possible. We will reuse some of the wood in construction of the new cabinets, though.
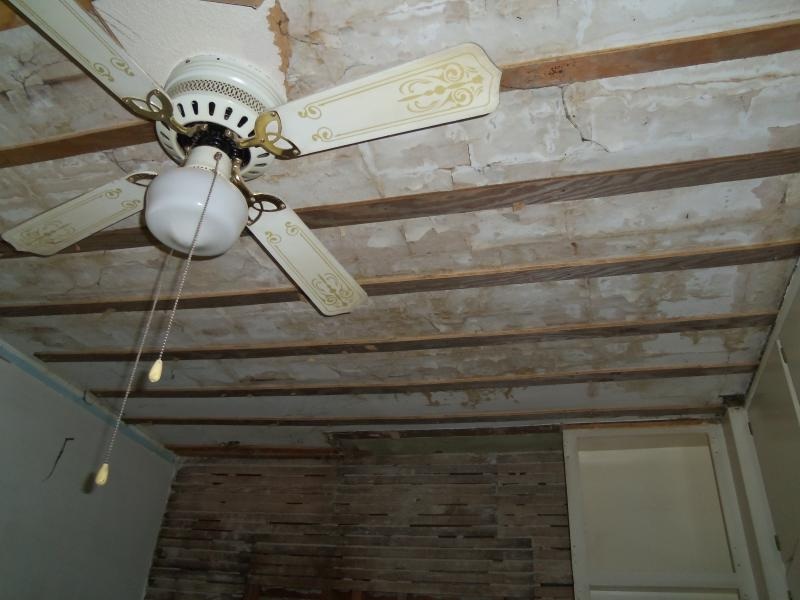
The ceiling was a quick tear-down of cardboard tiles put up post-1942 to cover the peeling paint and crumbling plaster. We'll drywall over top of it.
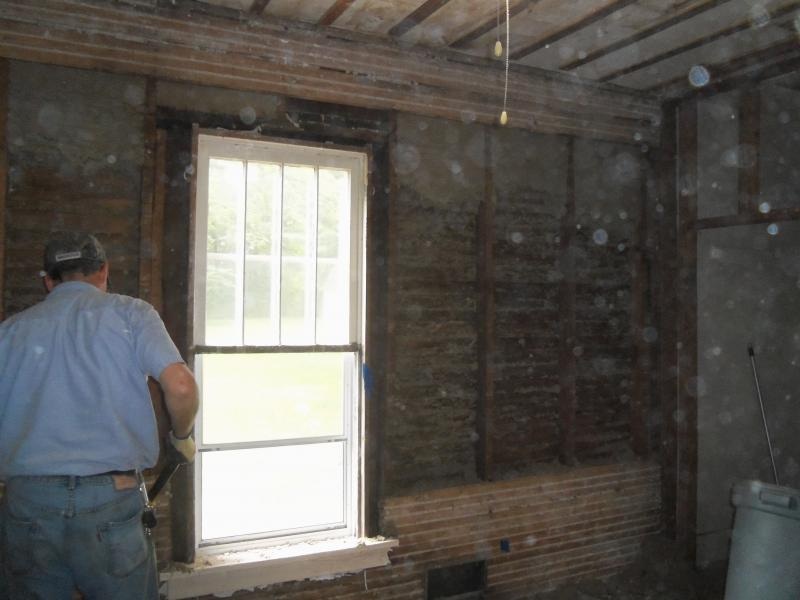
Then, on contemplating scraping the plaster keys out of the grooves in the wood in preparation to hang drywall, we opted instead to just pull the boards down, along with all the blown-in insulation behind them, which made quite the dusty mess.
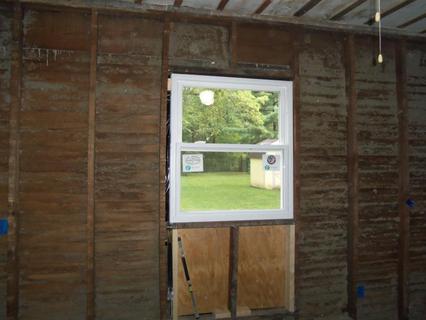
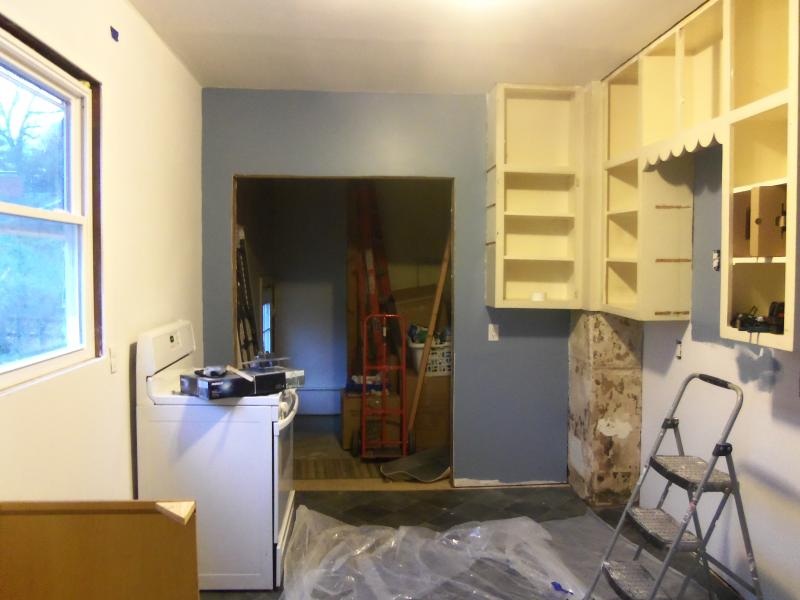
...and in with the new, smaller one. It's a bummer to lose window area, but we'll gain much-needed cabinet and counter space.
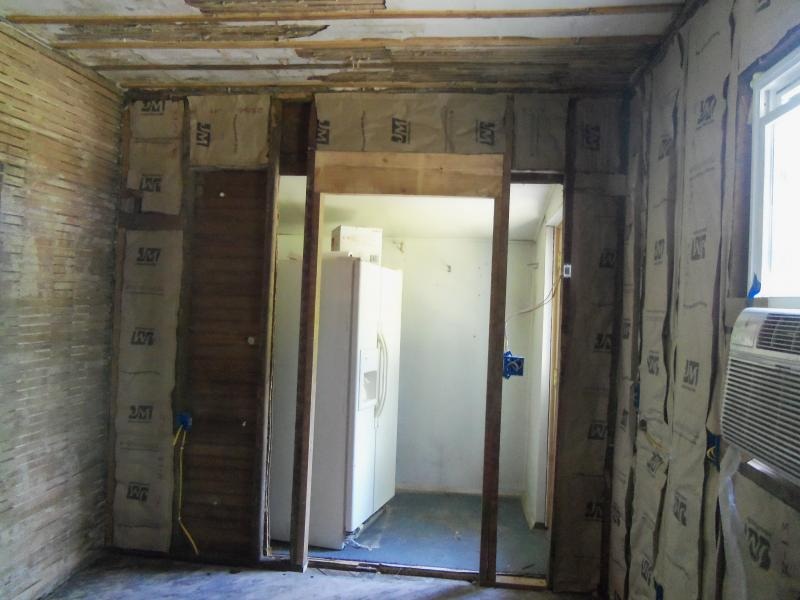
And the shifted-over doorway to the laundry room, reframed and headered to allow cabinets along the window wall. Note the window A/C unit, which was a temporary fix due to the central air unit having a bad coil. Much needed in the August heat & humidity!
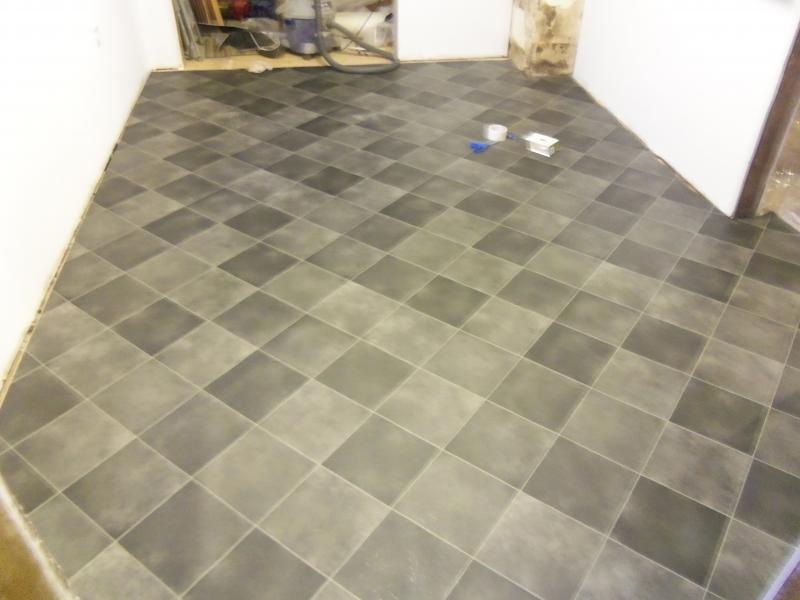
And the finished sheet vinyl. Not as low budget as we would have hoped (~$3/sf), but choices in gray were limited to special order.
|
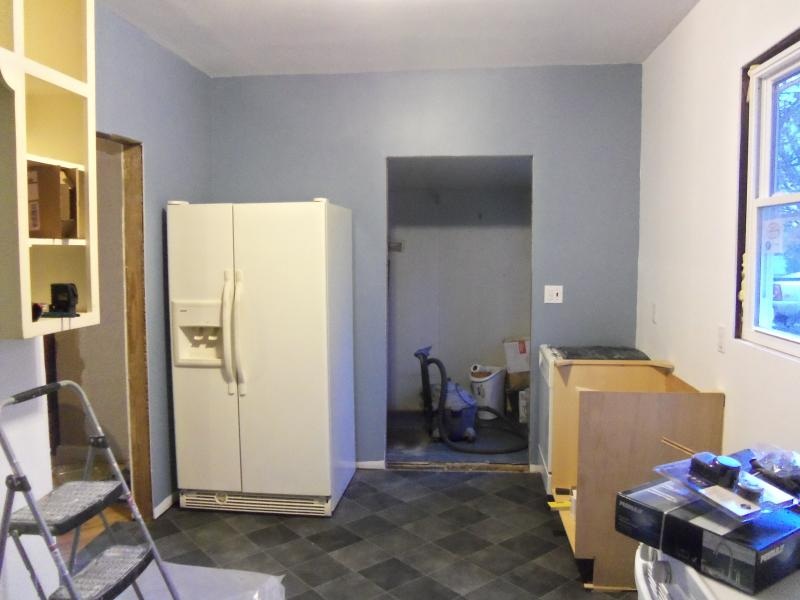
A coat of blue paint warms up the space. And we move in the appliances: the fridge from its temporary spot in the laundry room, and the range and dishwasher, courtesy of Craigslist ($150 for the pair thanks to someone else's kitchen remodel 80 miles away).
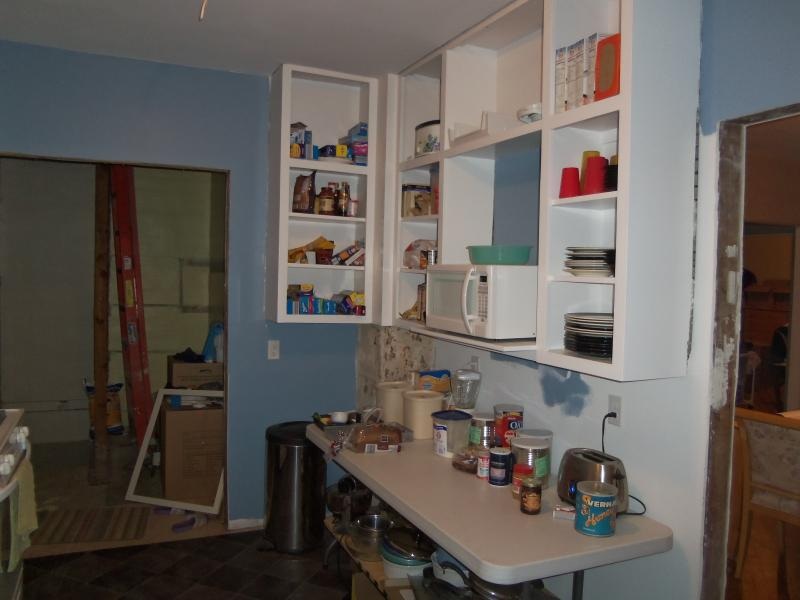
The remaining uppers then got a facelift: replacement of the scallop with a 1x2, the addition of a microwave shelf, and a thorough cleaning and painting following Squidoo's brilliant guide. We moved kitchen clutter as we needed it, from boxes in the dining room, to our temporary setup.
|
Meanwhile, cabinet construction was taking place in a shop at work a couple miles away. Yeah, theoretically we could have set up in the basement, but we were simultaneously rewiring and re-HVAC-ing, so it was a mess and half the lights were missing. The shop had a great table saw and a well-lit, well-powered room to work in. See Cabinets for more detail on the construction process.
|
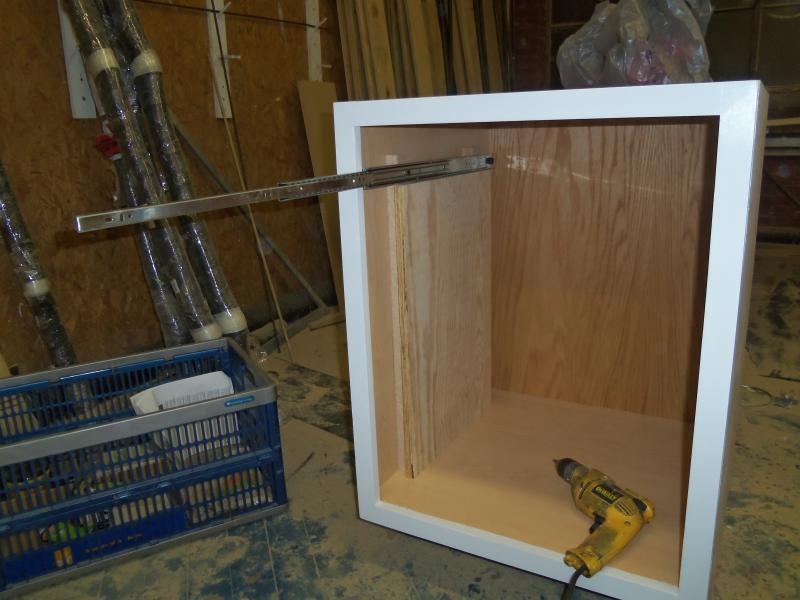
And these tired looking but solid cabinets ($47 on CL for these 3), using reclaimed paneling from the dining room wall (free!), plywood blanks from CL ($18 worth), drawer glides from amazon.com ($40), and face frame trim ($15, which was avoidable if I hadn't made a calculation error when designing the drawers, which necessitated replacing the existing frames) turned into 3 nice drawer bases. Not bad for $120, eh? They do, of course, still need drawer fronts, which we opted to purchase, for ~$20 each. That will bring the grand total to $300 for the set, MUCH less than the $500 each that drawer bases typically run in mid-range cabinet lines.
|
|
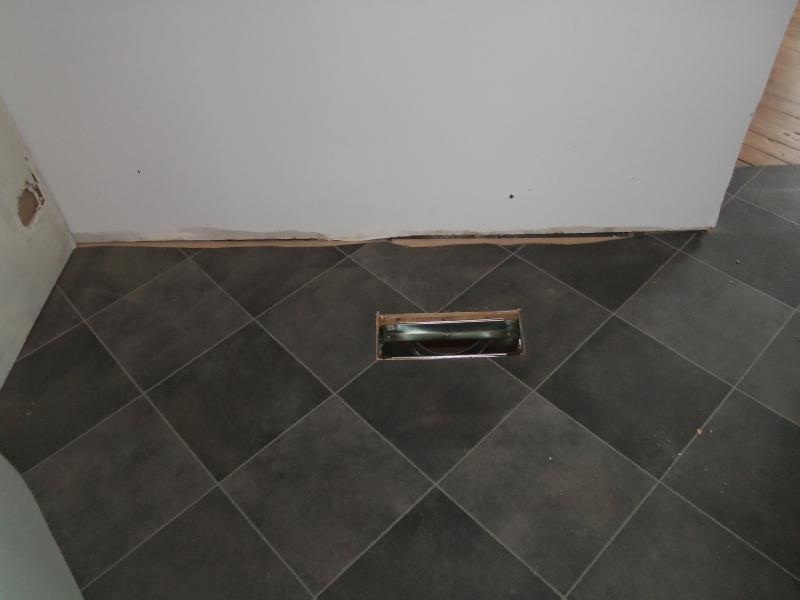
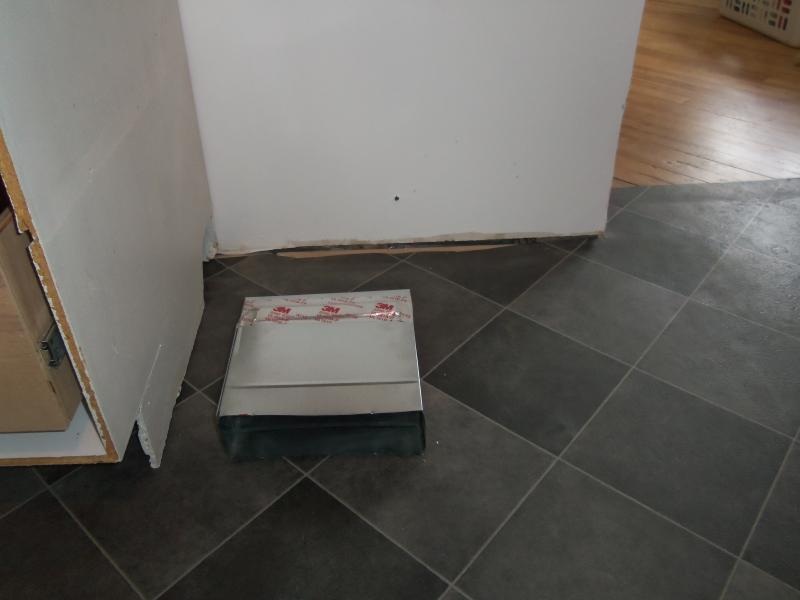
Before setting the cabinets in place, we ran an HVAC vent into the toekick of one of the cabinets, roughly in the center of the room.
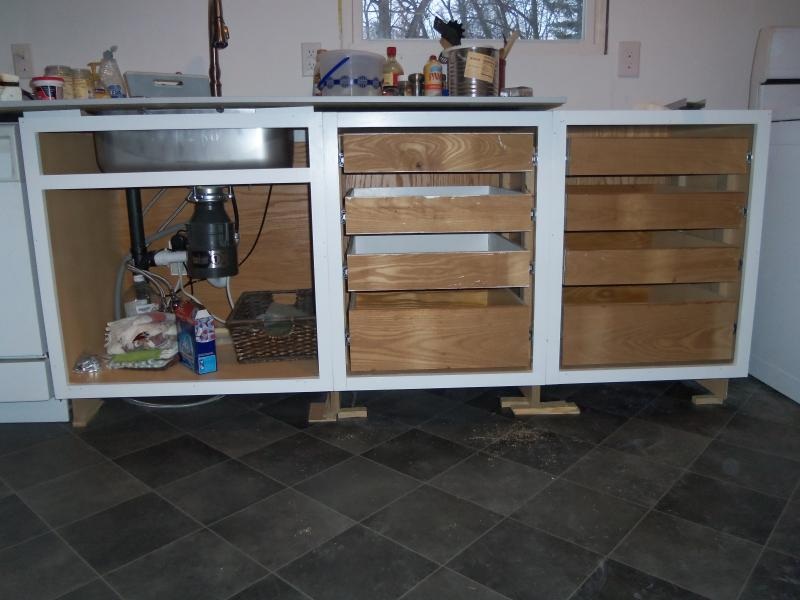
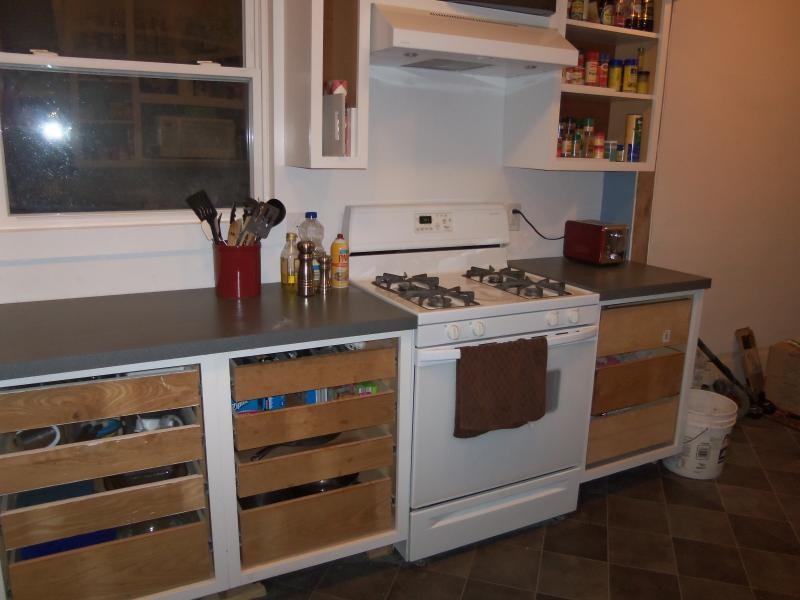
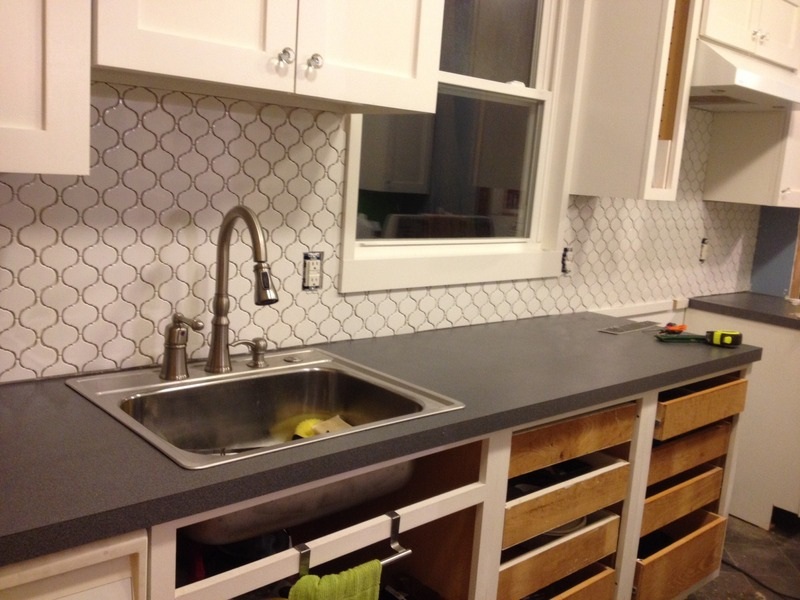
And the row of made-from-scratch cabinets that line the window wall. We had to shim them up over a half inch in the front because the floor sloped down.

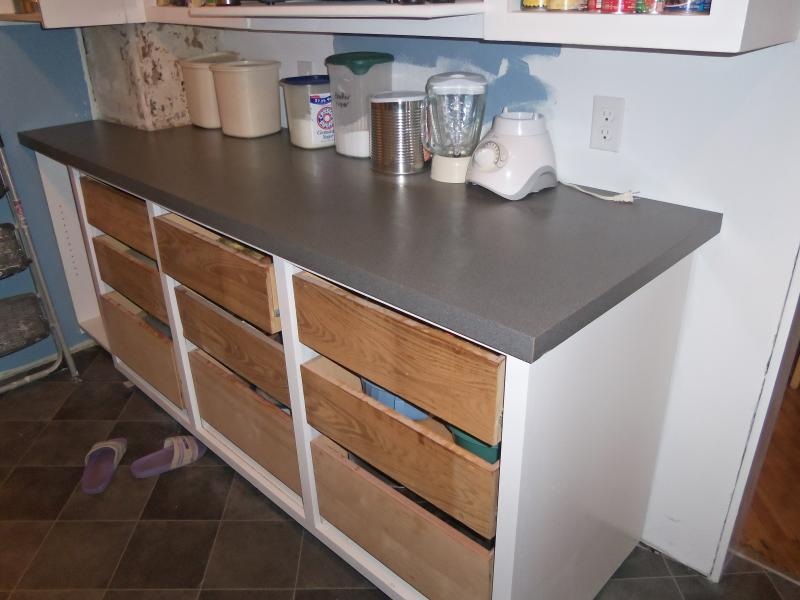
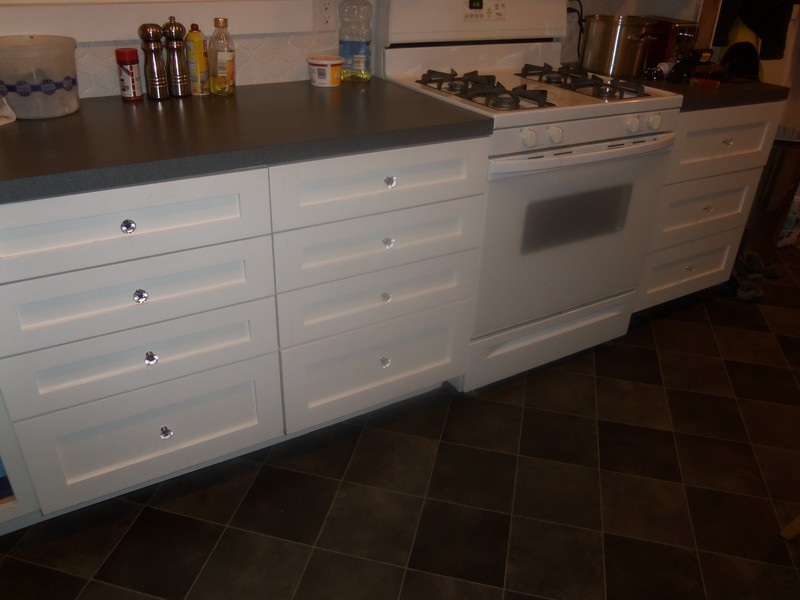
Our counters were DIY and completely free! This is thanks to scraps and remnants from work. We biscuit joined 1" MDF scraps together to make the 3 pieces of counter, and then used leftovers from a laminate job to cover them. It was a happy day when we tossed the dingy plywood.
The wall near the chimney was a bit wonky, so we dry fit the wood before laminating, and scribed it to match the wall and chimney contour. It now fits like a glove! DIY counters mean you can't get the rounded edges typical in store-bought stuff (that has to be done in a factory). But this is a modest house, and we're delighted with free counters. And note the drawer base to the right of the stove that snuck in along the way. 
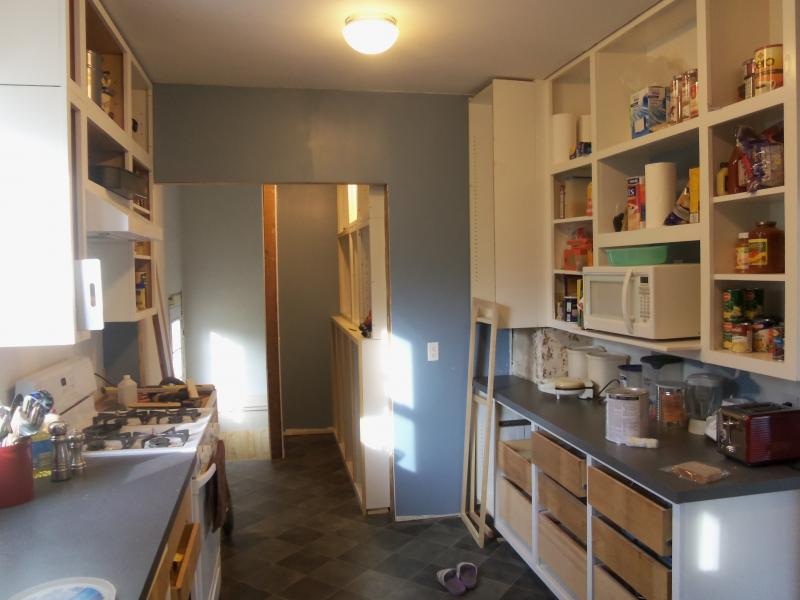
After rebuilding the basement stairs and moving the pantry wall in, to allow for wider stairs (see basement), we extended the vinyl flooring from the kitchen into the pantry area. The vinyl was not made to exactly match at the seams, so we had to find a row that was the best match, slipped the new vinyl under the old vinyl to exactly match up the grout lines, and slice along the joint. You can still see a little color difference, but that was as close as we could get.
|
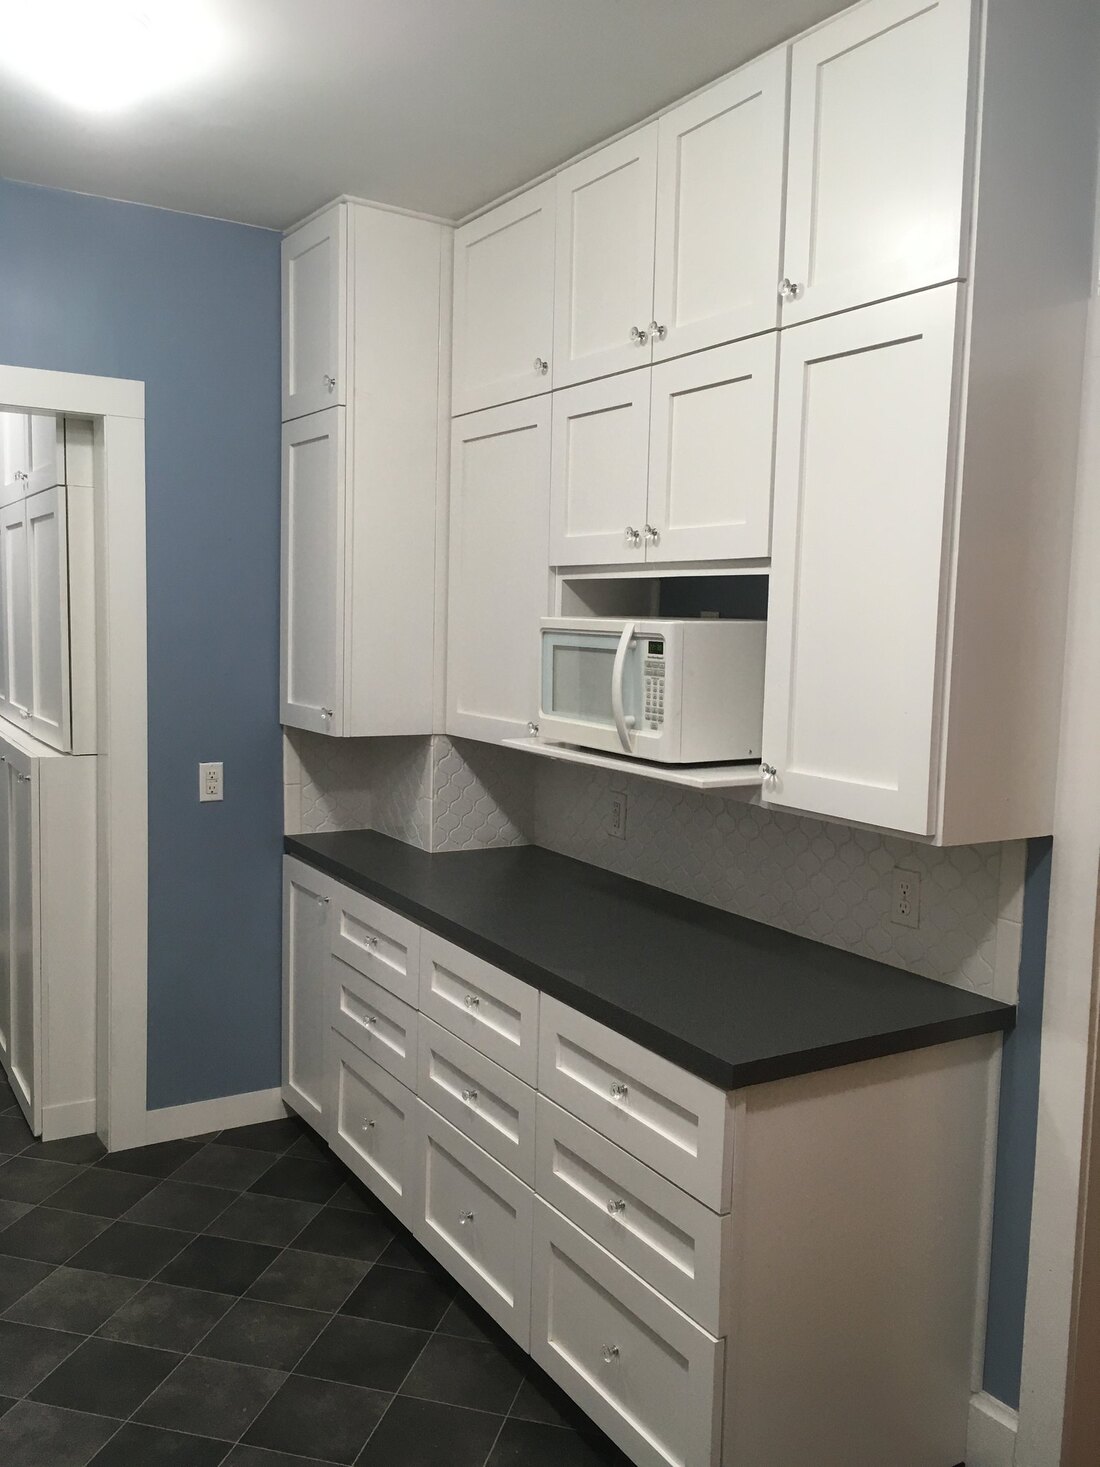
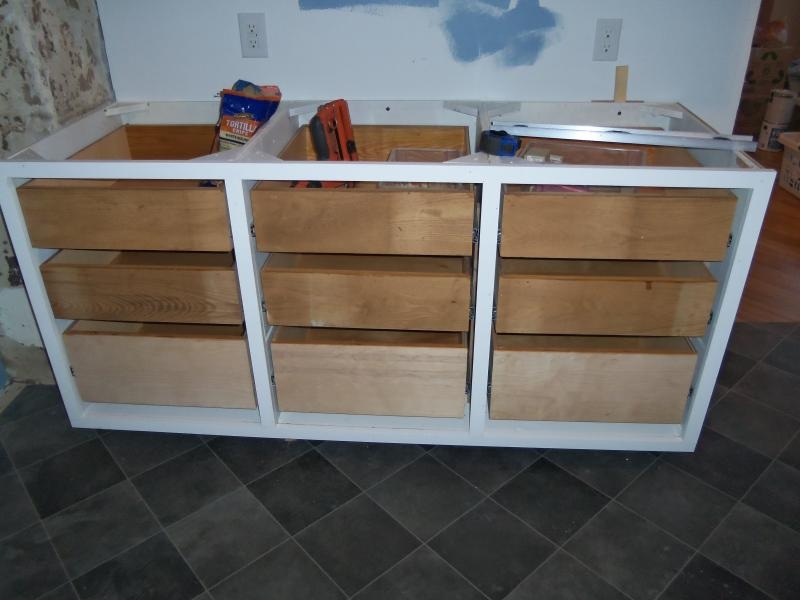
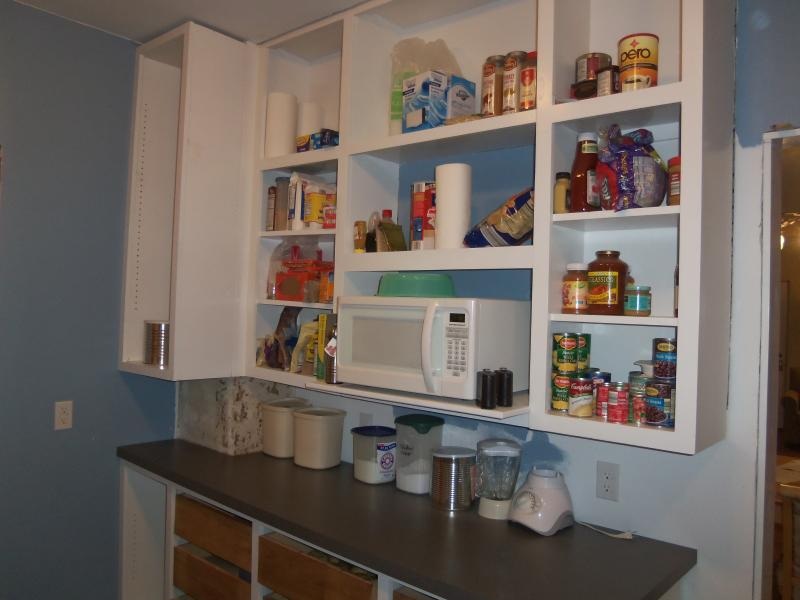
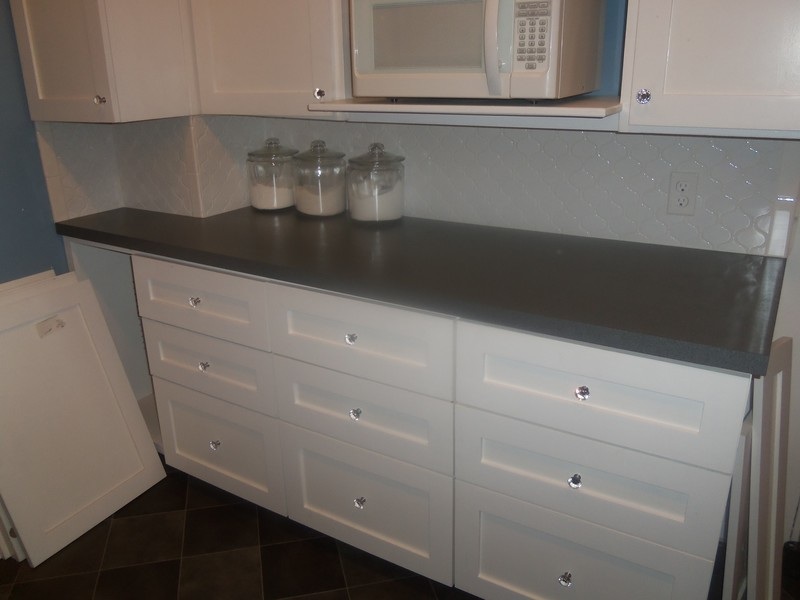
Then the uppers: 2 recycled ones (in the upper outside corners) and 8 new boxes.
Then
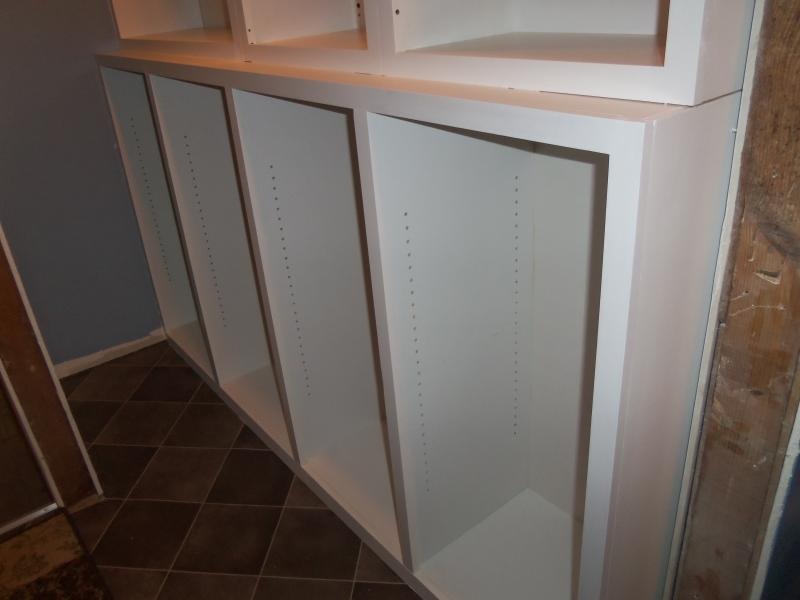
we built the rest of the pantry cabinets and installed them. The
lowers are 15" deep and the uppers are 12" deep. The lowers and the
left-hand uppers were built from scratch and the right-hand uppers are 4
rehabbed cabinets. We debated the design, because the left side has tight clearance between cabinet and wall. But it maximized the storage space, and we've got a creative solution for the tight clearance coming soon....

|
Close ups of the lowers ..........................................................................................................and uppers.
Total dimensions are 82" wide x 102" tall.
Total dimensions are 82" wide x 102" tall.
|
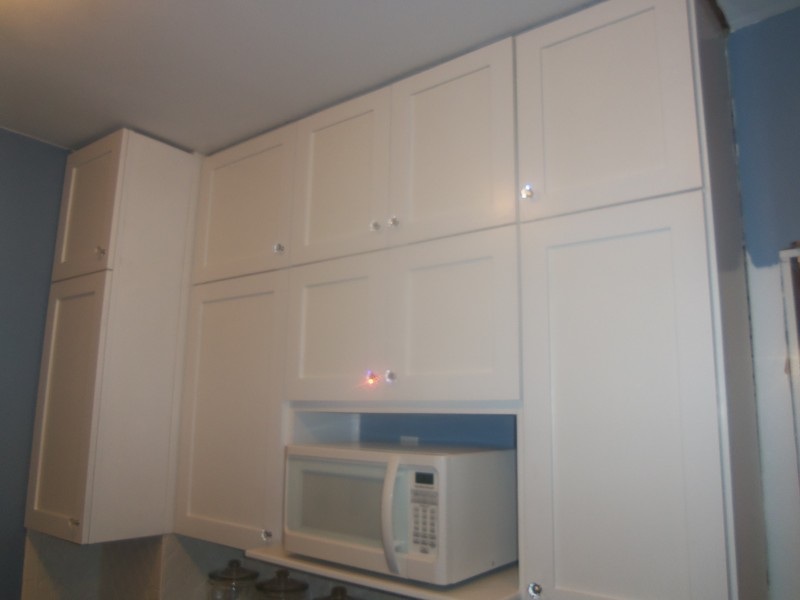
One final modification to the cabinetry was a reorientation of the cabinets around the chimney. After originally keeping the upper facing left, we pulled it out and replaced it with a shallow one facing out. And added a bottom cabinet to match. And we added a shelf/cabinet-to-be over the microwave. Now we're finally ready to order the doors!! |
|
|
|
And what a difference doors and drawer fronts make! It's starting to feel like a real kitchen. We opted for clear glass knobs for a period feel.
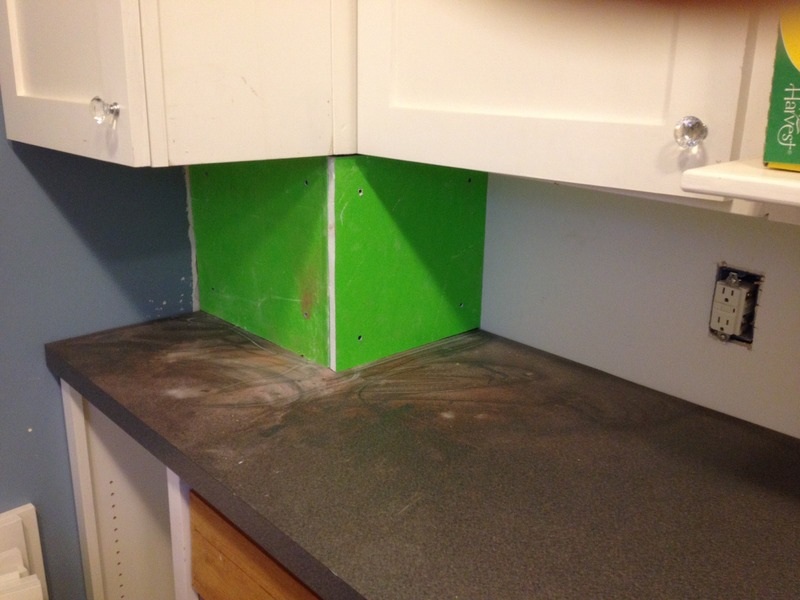
On to the backsplash...We attached some wall board around the chimney to provide a good tile substrate.
The l-o-n-g sink/stove wall got the same treatment.
|
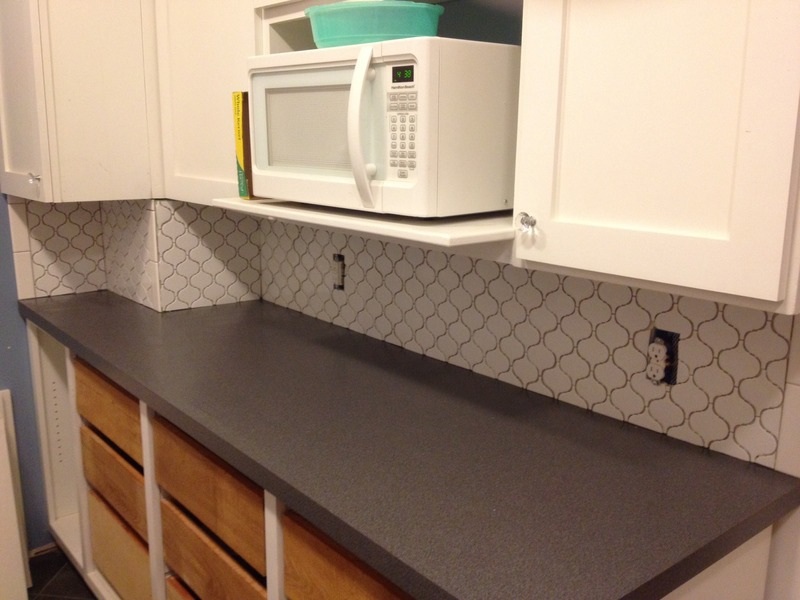
And installed ceramic arabesque tile on all the walls.
And here's how it looks all grouted up.
|
The After...